Snapshots
Overview
Snapshots let you package your best AI agents — together with everything they know and every tool they use — into a reusable template, and install that template on any of your sub-accounts in one click.
Perfect your setup once on your own account, capture it as a snapshot, and every new client starts from that proven setup instead of a blank page. It works the other way round too: capture the agents a client built in their sub-account and install them on your own account or on other clients. You can also share a snapshot with a link, so anyone with an account can install it.
Prefer to see it? Click through the whole flow:
A snapshot includes, per agent:
- The agent’s full configuration — instructions, playbook, personality, behavior and reply settings, active hours.
- Knowledge (optional): the agent’s FAQs and knowledge-base sources, including uploaded files.
- Tools (optional): the agent’s custom functions and connected MCP servers.
- Media library (optional): the images, videos and documents the agent can send, with their sending instructions.
And, for the account as a whole rather than per agent:
- Automations (optional): any of the account’s Automations you tick, with their triggers and steps.
- Pipelines (optional): your deal pipelines with their stages, colours, won and lost outcomes, default values, idle auto-move rules and trigger tags.
- Custom fields (optional): your contact custom fields, with their types and dropdown choices. Only the fields travel, never the values stored on your contacts.
A snapshot is a copy taken at capture. If you keep editing the agent afterwards, the snapshot doesn’t change by itself. You can see and edit what a snapshot contains at any time: add items, update single items to their current version, or remove them.
Agency accounts on the new Agents workspace. Snapshots exist to distribute agent setups from an agency to its sub-accounts, so the page appears once your agency account runs on the new Agents workspace (accounts are moved over automatically — nothing to do on your side). Sub-accounts can receive a snapshot once they’re on the Agents workspace too; the apply picker shows which ones are ready. Any new client you create once your agency is on the workspace starts there automatically, so it’s ready to receive a snapshot straight away — no waiting and nothing to switch on.
Where to Find Snapshots
Click Snapshots in the main sidebar — it sits right under Sub Accounts, near the bottom of the menu.
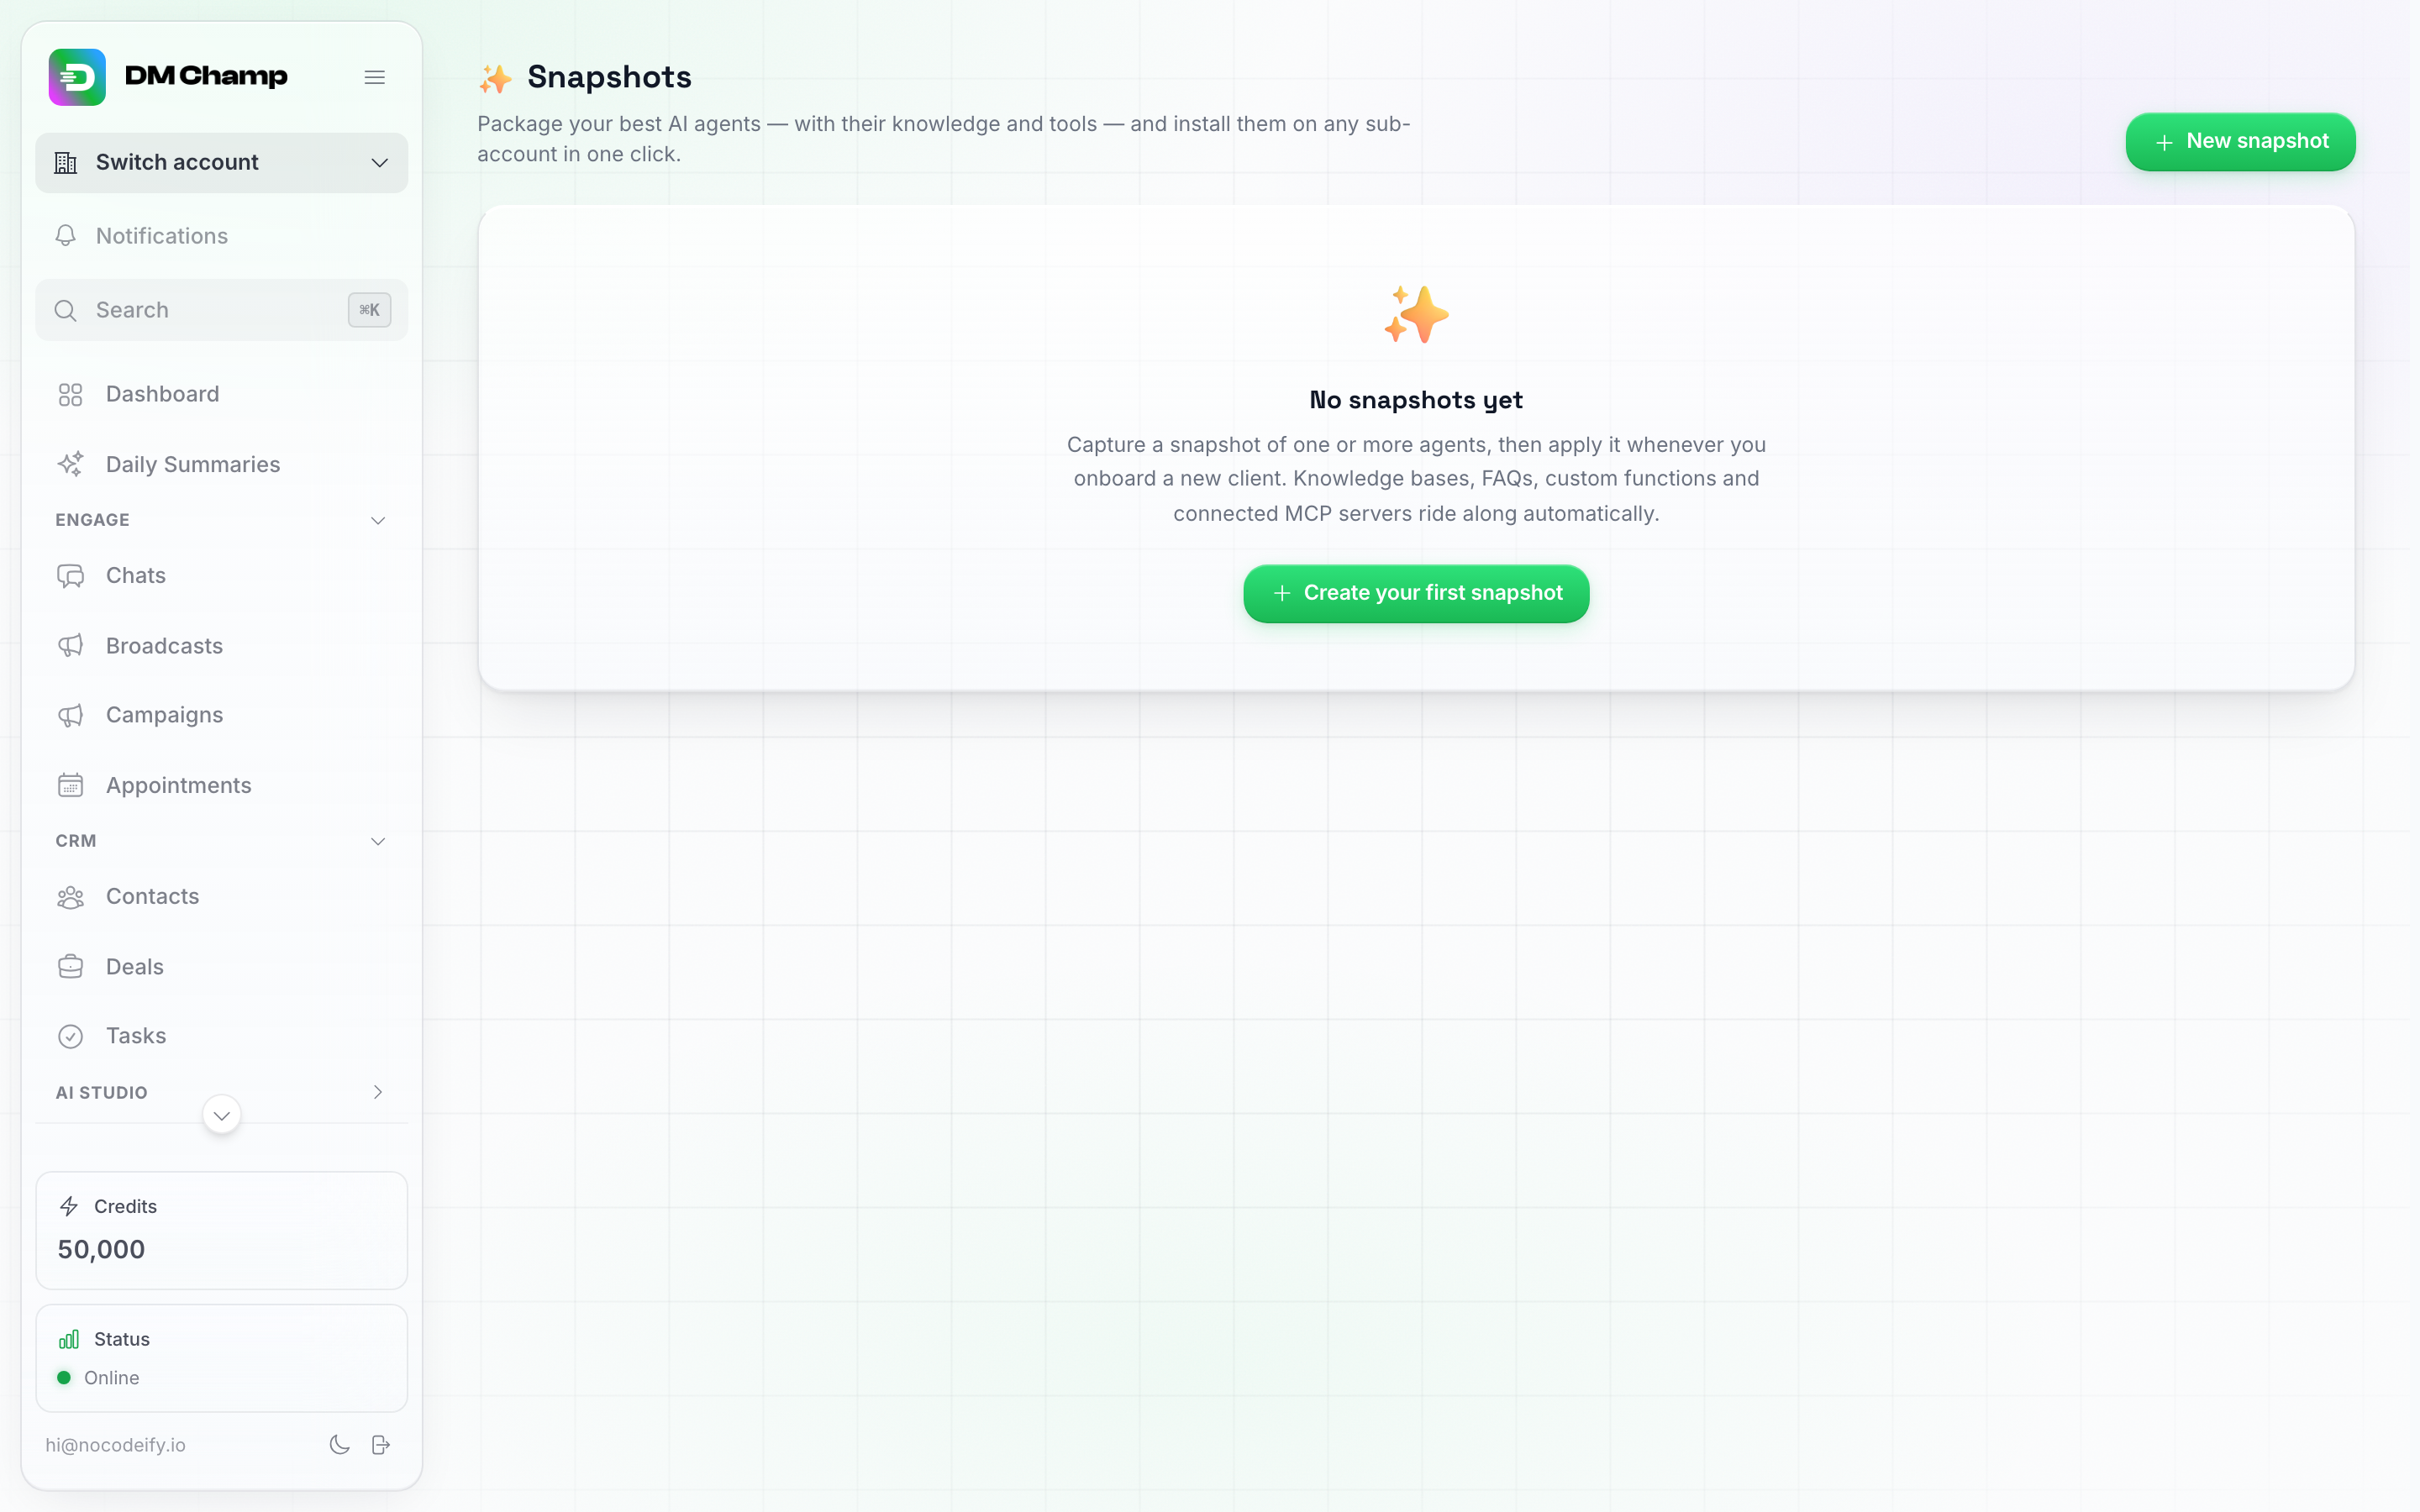
The Snapshots page. Before your first capture, the empty state explains the idea and offers Create your first snapshot.
Capturing a Snapshot
- Open Snapshots and click New snapshot.
- Give it a recognizable name — e.g. “Real-estate starter kit”.
- Leave Capture from on Your account, or pick one of your client accounts to capture the agents that were built there (see Capturing a client’s agents).
- Tick the agents to include. You can bundle several agents into one snapshot.
- Choose what rides along:
- Include knowledge — FAQs and knowledge-base sources (with their files).
- Include tools — custom functions and MCP servers.
- Include media library — the agent’s sendable images, videos and documents.
- Include automations — your Automations travel with the snapshot too. Switch it on and a list of the account’s automations appears underneath, so you can send the whole set or tick just the ones that belong to this template.
- Switch automations on when installed is a checkbox under Include automations, and it reads: “Automations arrive running in the client account instead of paused. AI agents still arrive inactive. Only applies to your own sub-accounts, never to installs from a shared link.” Off unless you tick it. See Automations that arrive switched on.
- Include pipelines — your deal pipelines, with their stages, stage colours, won and lost outcomes, default values, idle auto-move rules and trigger tags. The switch only appears when the account you capture from has a pipeline, and it is on by default.
- Include custom fields — your contact custom fields, with their types (text, number, date, dropdown, yes or no) and dropdown choices. It is on by default. When you capture from your own account, the switch only appears if you have custom fields; when you capture from a client account it always shows, and the client’s fields are copied if they have any.
A snapshot can hold automations only. An agent is not required: leave every agent unticked and, as long as Include automations is on and the account you capture from has at least one automation, Capture snapshot goes ahead and the snapshot holds just the automations you ticked. That is the way to keep a set of workflows you install on client after client without an agent riding along, and it also means an account with no agents at all can be the source.
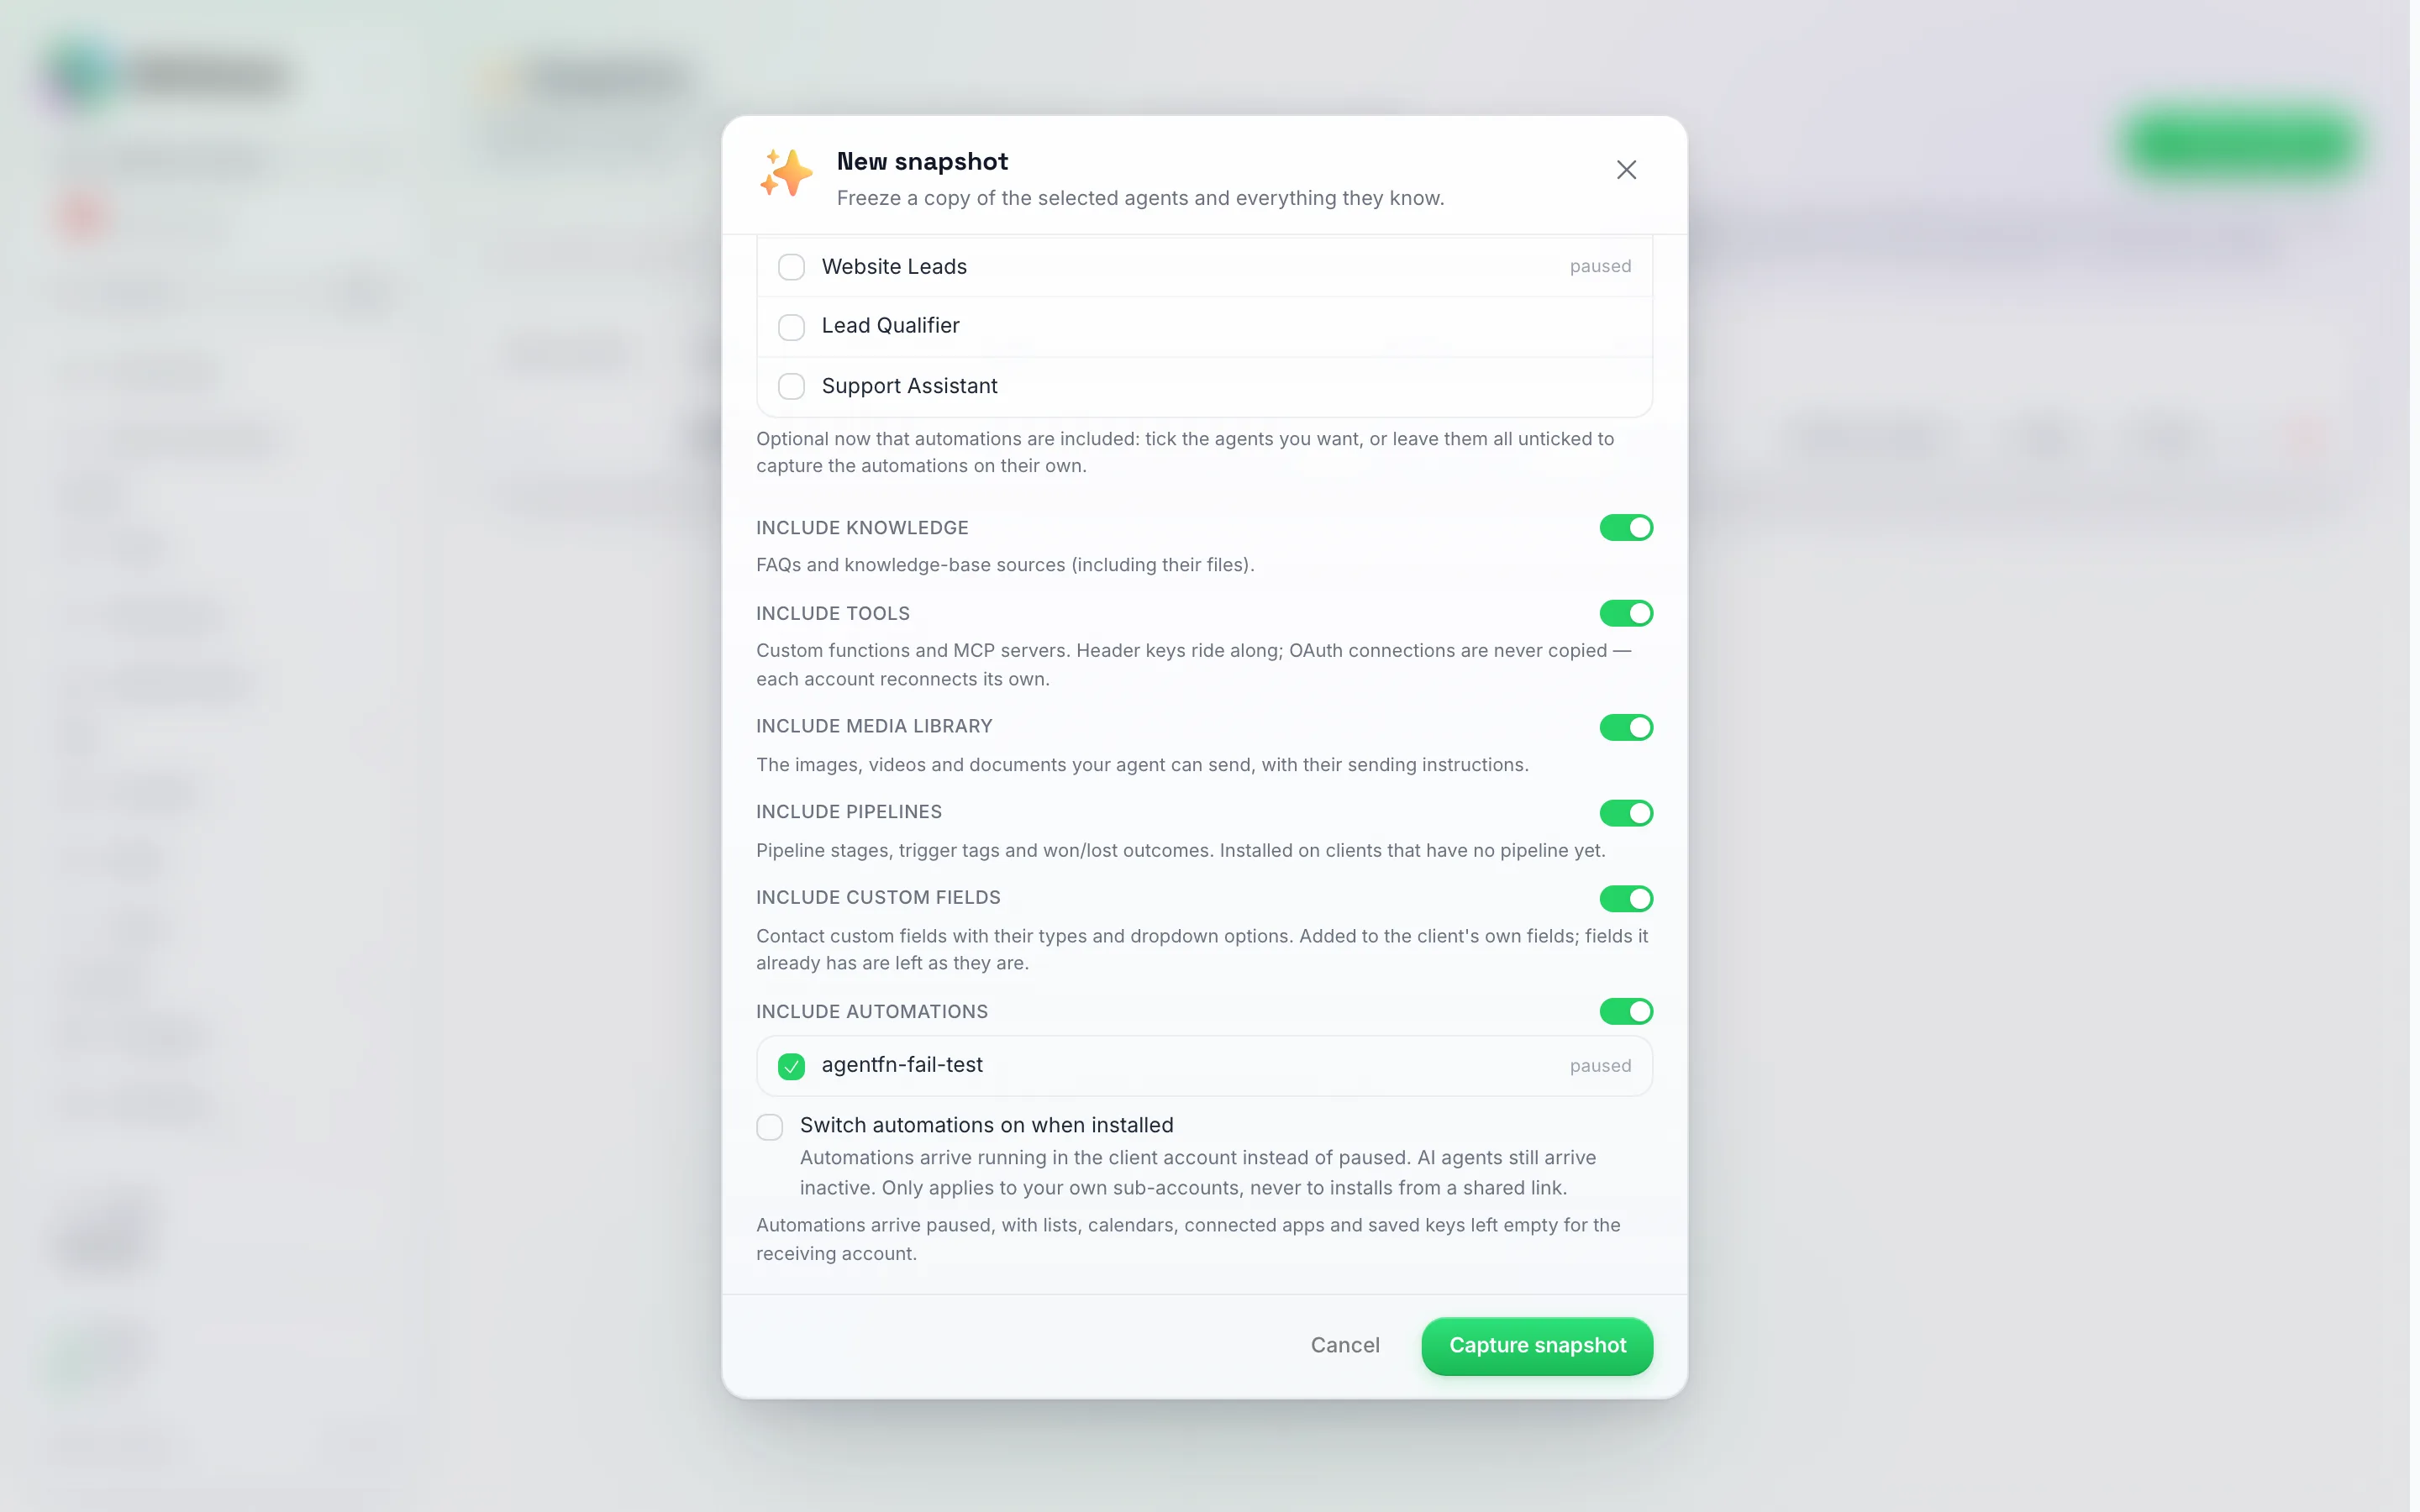
The New snapshot window scrolled to its switches. Include custom fields sits between Include pipelines and Include automations and is on by default. When you capture from your own account, the switch only shows if you have custom fields.
- Click Capture snapshot. Capturing can take a little while when a lot of knowledge is included.
The new snapshot appears in the list with a summary of what’s inside:
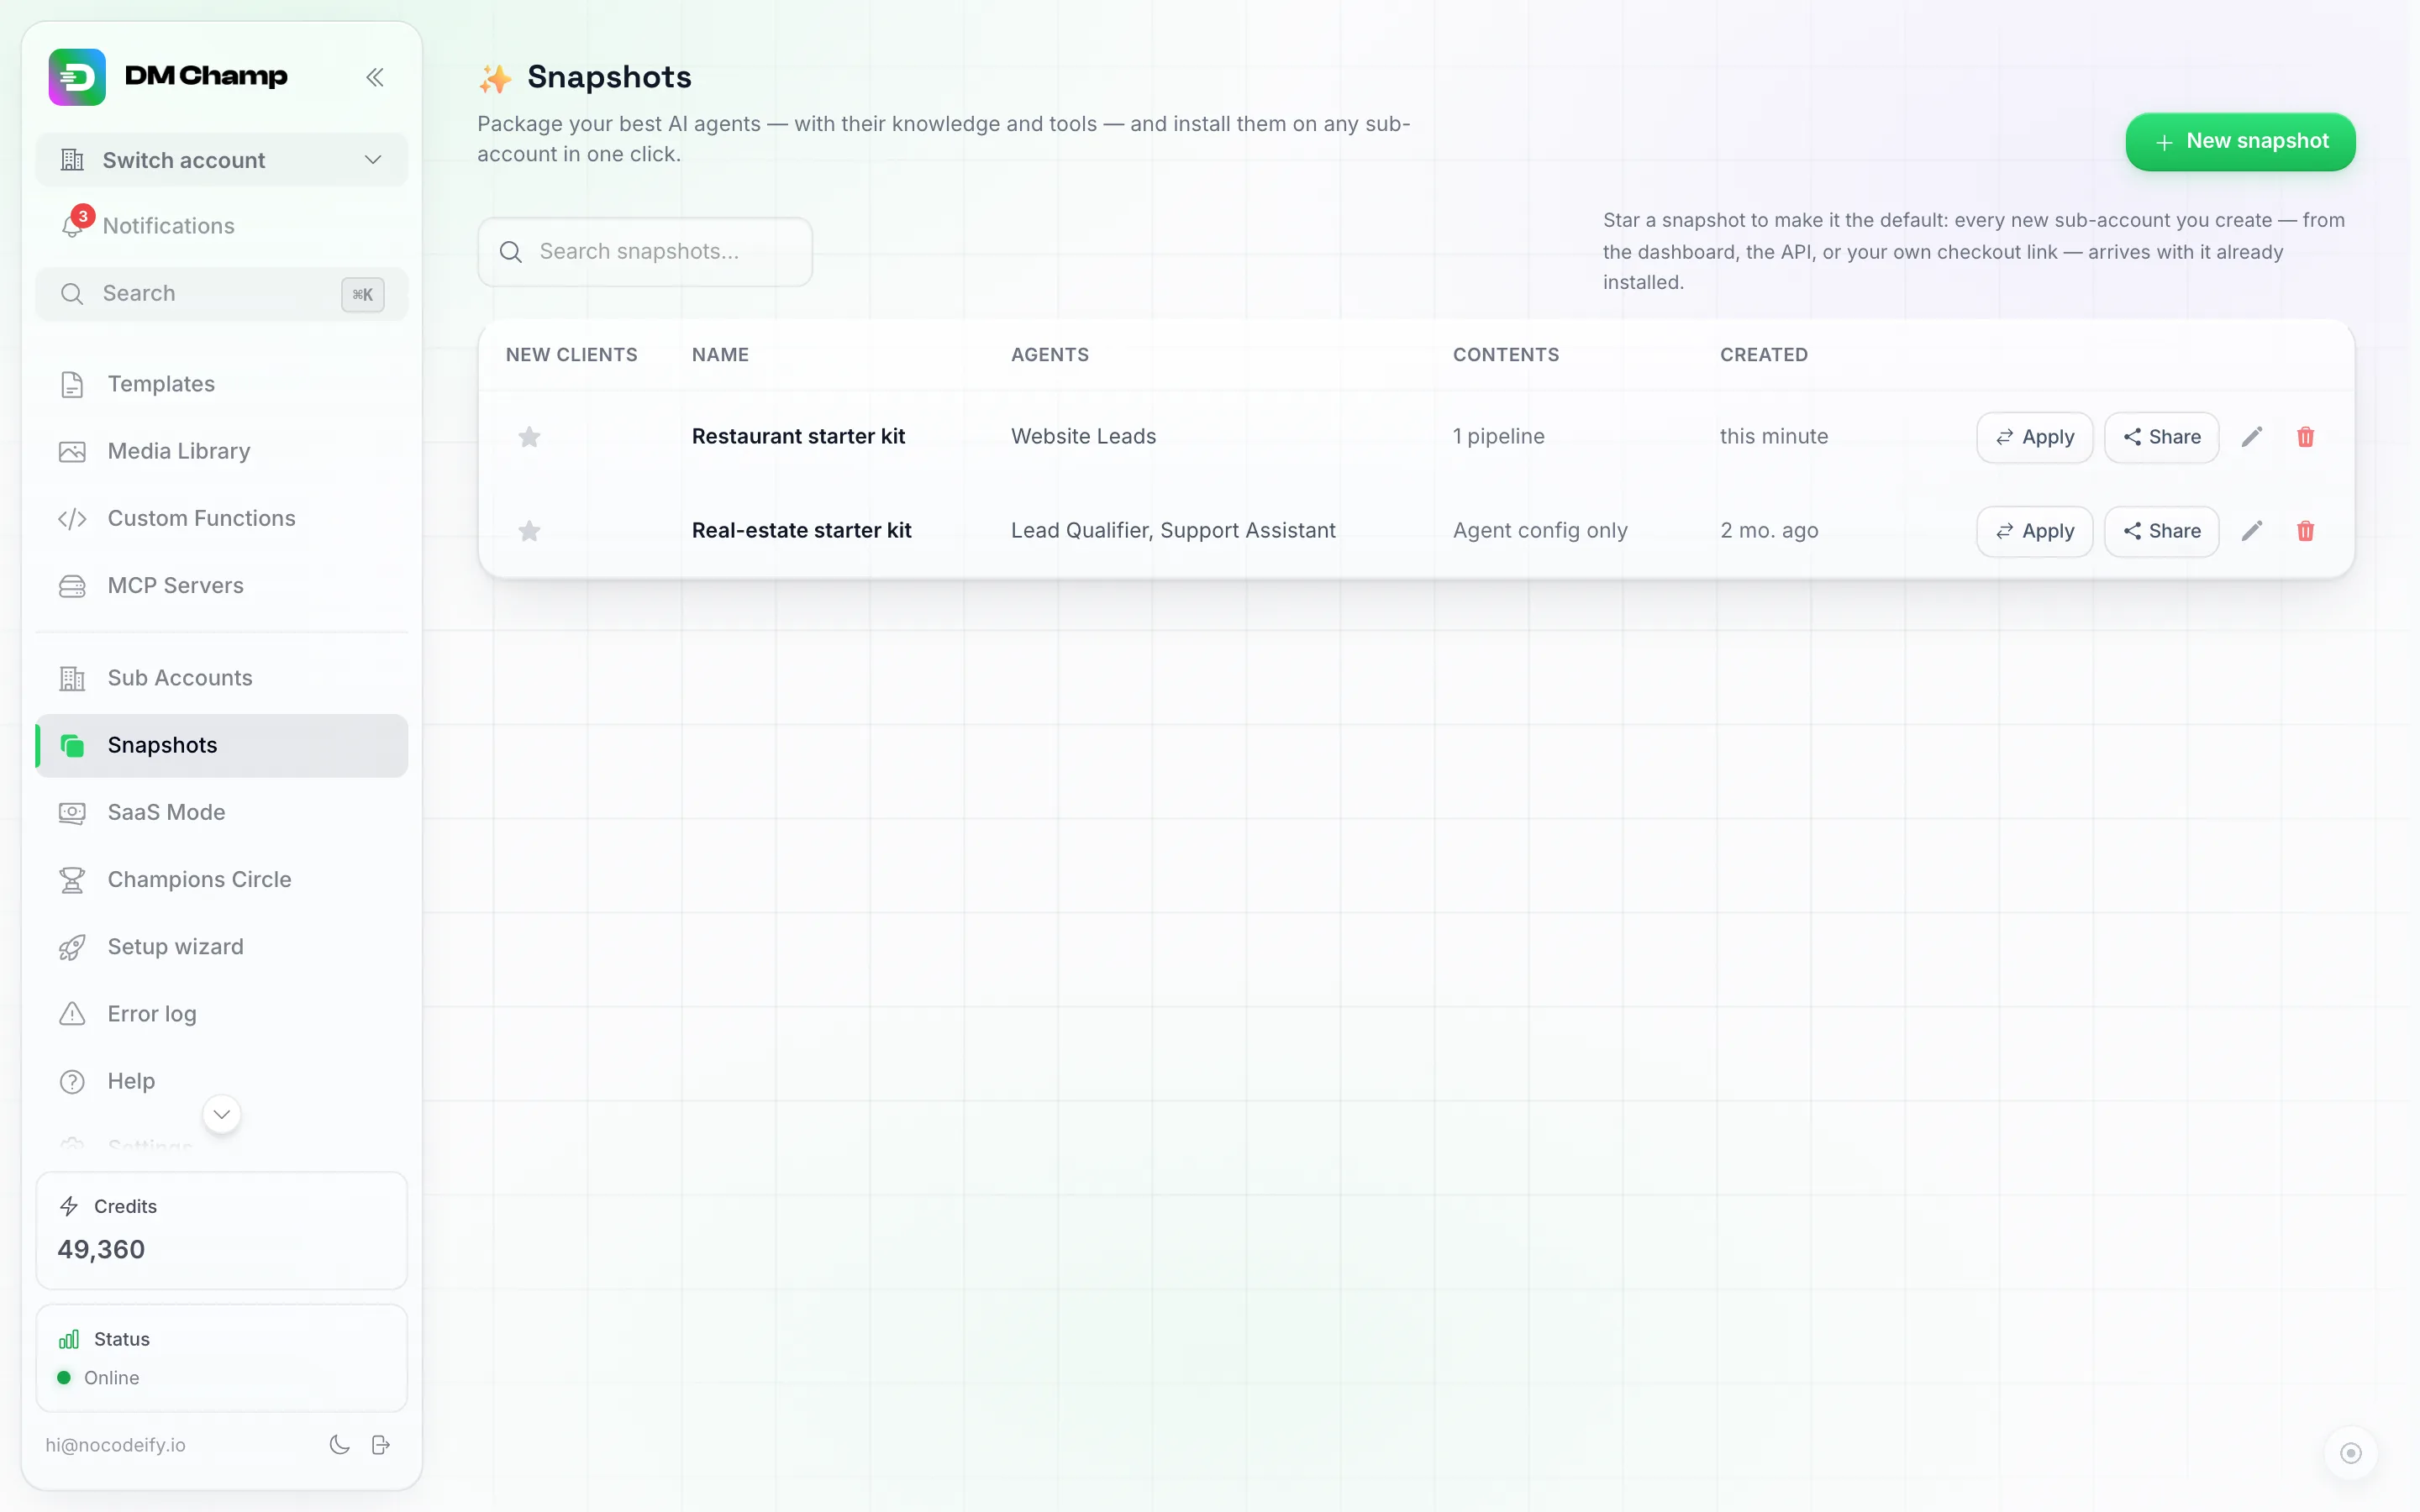
Each row shows the agents inside, a contents summary (here 1 pipeline), and the actions: the New clients star (see below), Apply, Share, rename (pencil), and delete (trash).
Capturing a client’s agents
The agents worth templating are not always on your own account. A client may have built and tuned their own AI Agent inside their sub-account, or you may have set one up while signed in as that client and now want it on your agency account as well. The Capture from select at the top of the New snapshot window lists your client accounts with the number of agents each one holds; pick one and the agent list underneath switches to that client’s agents.
- The snapshot belongs to your agency account, whichever account it was captured from. The client’s own agents are left exactly as they are.
- Everything that normally rides along (knowledge, tools, media, automations) is taken from the client’s account, so the copy is complete.
- Apply it like any other snapshot: tick your own agency account in the Install into list to get the agents on your account, or tick other clients to roll the setup out to them. Installed agents start paused, as always.
- A client with no agents yet can still be the source, as long as what you are capturing is their automations: tick Include automations, tick the automations you want, and capture with no agent selected.
Applying a Snapshot
- Click Apply on a snapshot.
- Tick the accounts to install into — any of your sub-accounts, or your own agency account (which gives you a fresh copy of everything).
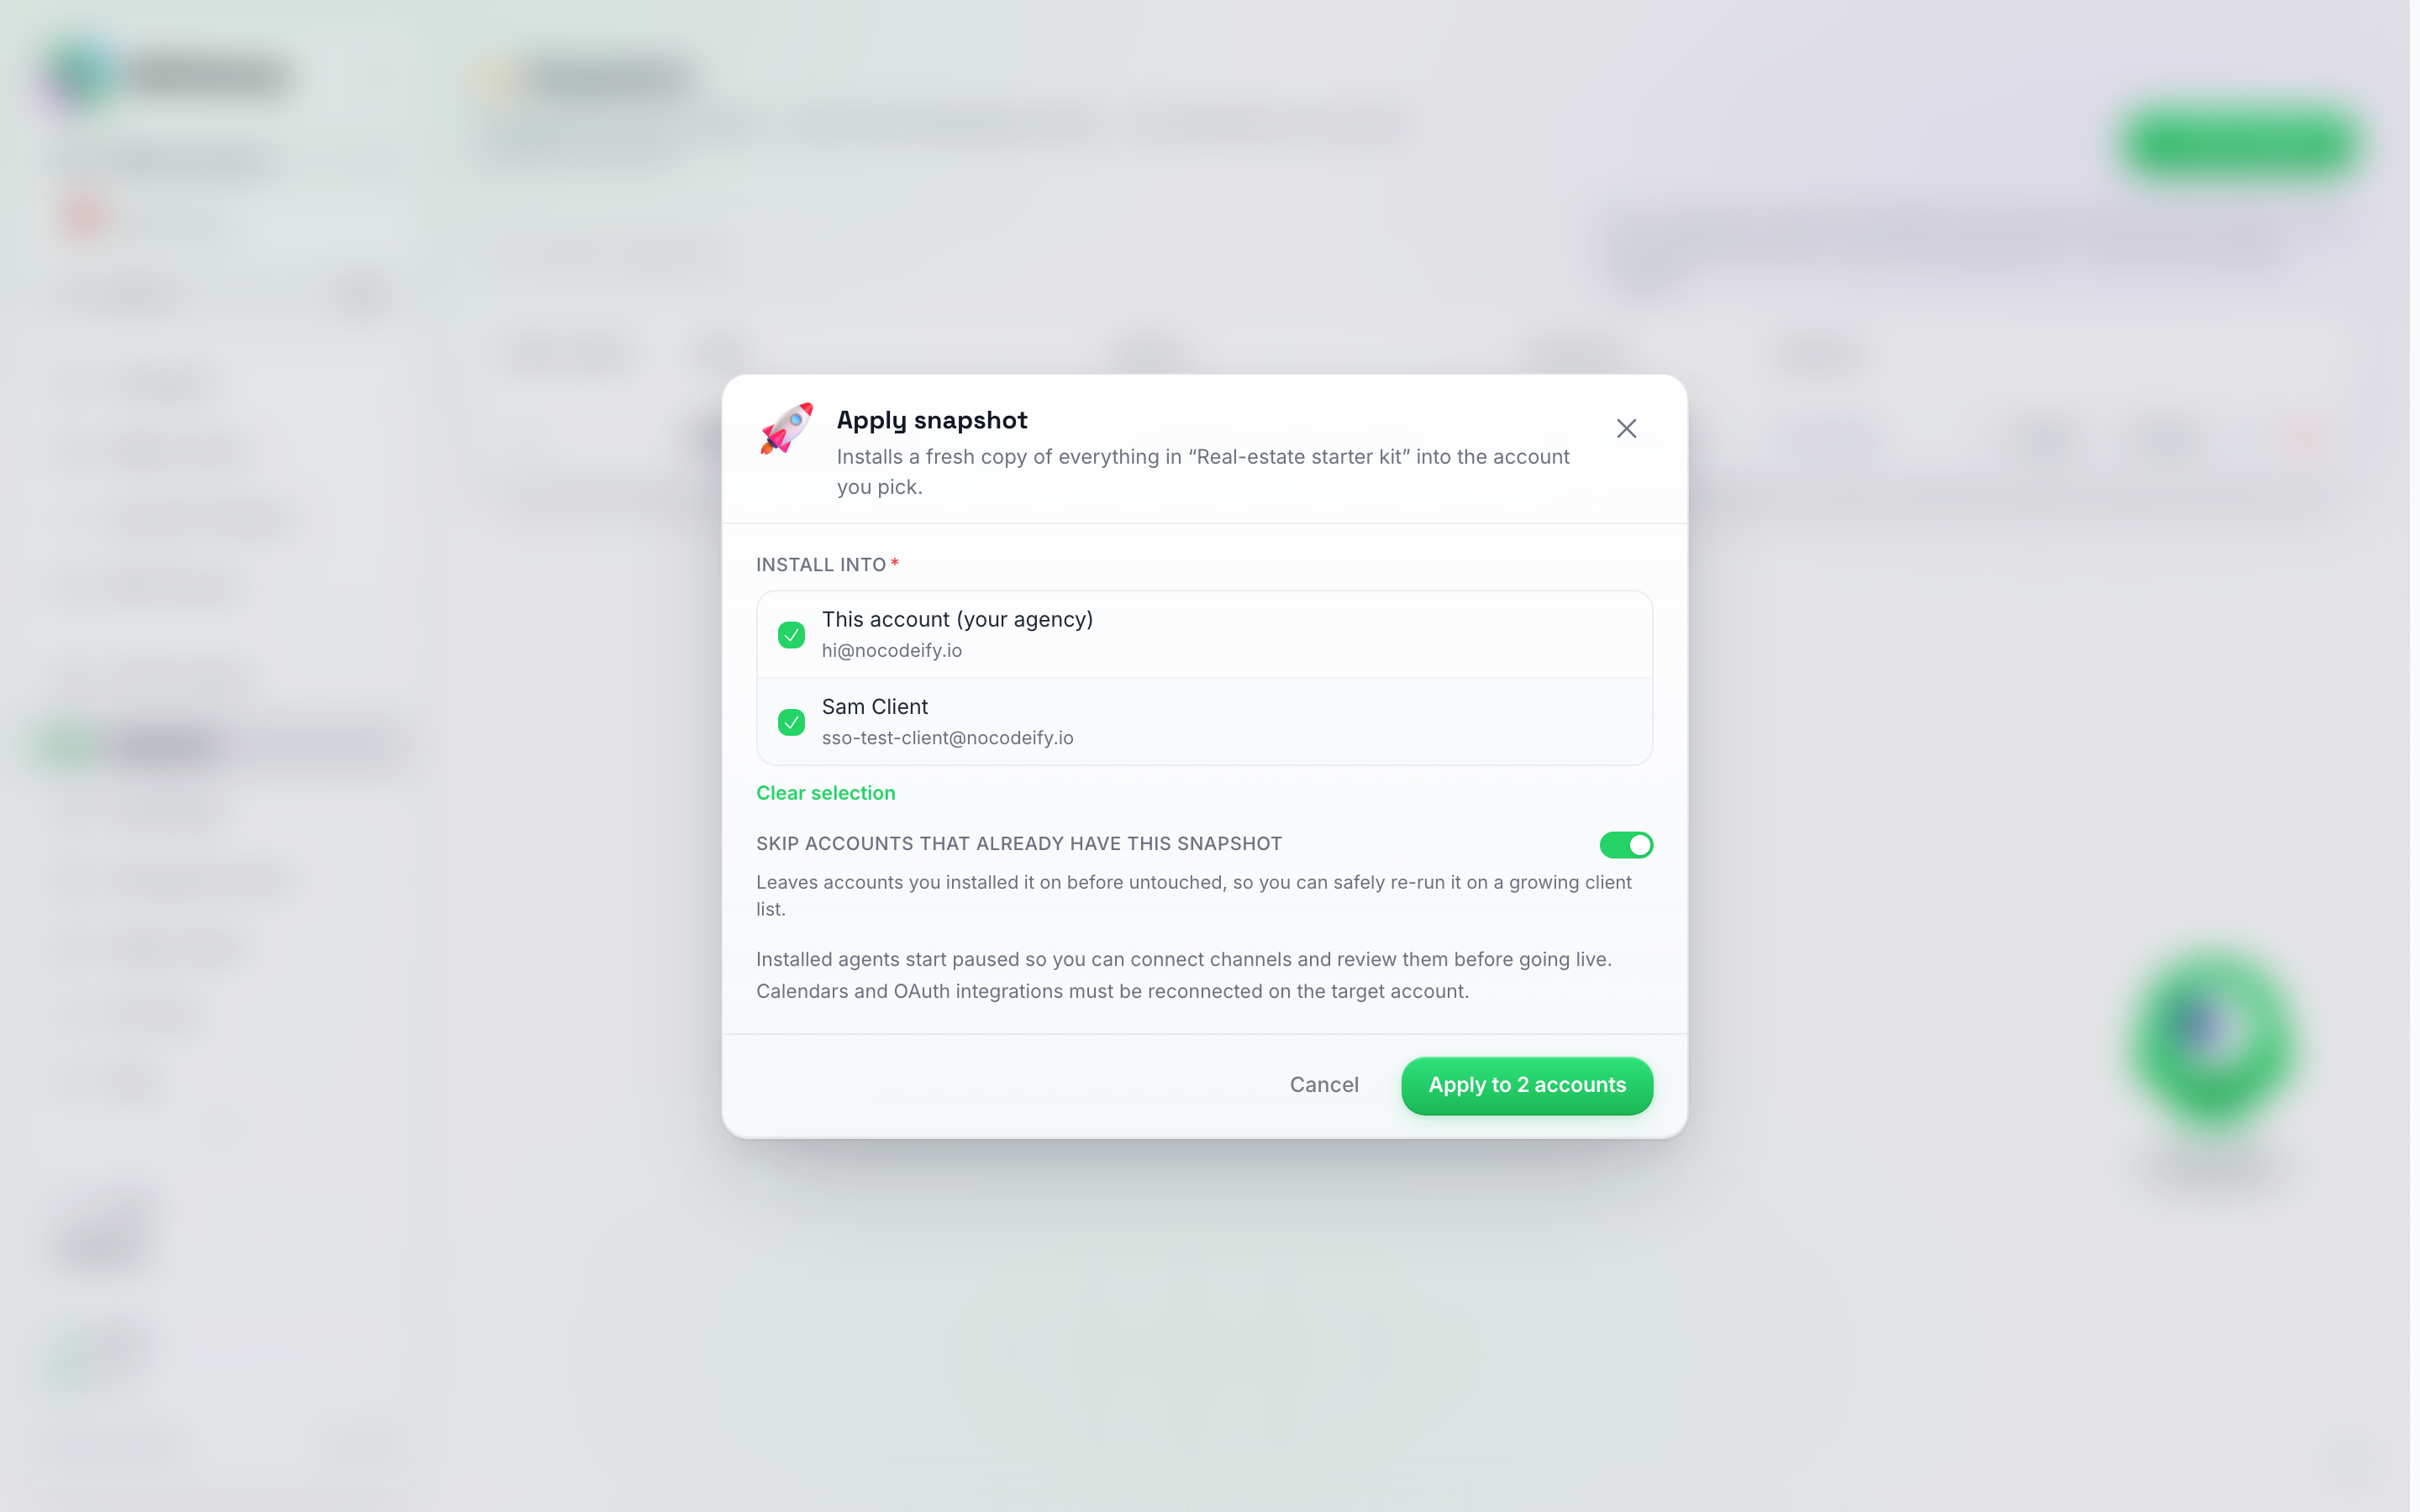
The Apply window. Tick one account or many — and note the reminder: installed agents start paused, and calendars/OAuth must be reconnected on the target.
- Click Apply to N accounts.
A fresh copy of every agent in the snapshot — plus its knowledge and tools — is created in the target account. Applying the same snapshot twice creates a second copy; nothing is overwritten.
Installed agents start paused
Agents land in the target account switched off, on purpose: a few things are account-specific and need to be wired up on the target before the agent goes live:
- Channels — connect the target account’s own WhatsApp / Instagram / other channels and point them at the new agent.
- Calendar & bookings — if the original agent booked appointments, reconnect a calendar on the target account and re-enable bookings.
- Connected integrations that use OAuth (e.g. an MCP server you authorized with a “Connect” button) — for security these connections are never copied, so the target account authorizes its own. Tools that use a simple API key keep working right away.
Once channels are connected, flip the agent to active on the target account’s AI Agents page.
Pipelines
Pipelines land under a rule of their own, because a board that is already in use must never be replaced: removing a stage would hide the deals sitting in it.
- Your main pipeline is installed only on an account whose own board still has no stages. An account that already built a pipeline keeps it, and the result screen says the pipeline was left off because that account already has its own.
- Extra pipelines are installed when their name is still free on the target account. One that is already there, one that would push the account past its 10 pipelines, or one whose stages clash with stages already on the account is left off, and the screen names the reason.
- Trigger tags are recreated by name on the target account. A trigger tag can only drive one stage per account, so a tag that already drives another stage there is left off that stage. The result screen lists every tag it had to leave off, so you can point that stage at a different tag.
- Before you apply, the window lists the pipelines that ride along, each with the number of stages and trigger tags inside it, and reminds you that they only land on an account with no pipeline of its own yet. Afterwards the result screen shows how many were installed, which were skipped, and why. The Share window shows the same list in its checklist.
The deals on your boards are never captured, only the boards themselves.
Custom fields
Custom fields are added to the account you apply to. Nothing is ever taken away:
- A field the account does not have yet is added, with the type and dropdown choices it has in the snapshot.
- A field the account already has (same field name) is left exactly as it is, even if its type or dropdown choices differ from the snapshot. Changing it could make the values already saved on that account’s contacts unreadable, so the account’s own version always wins. The result screen lists these fields so you can adjust them by hand if you want.
- Fields the account has that are not in the snapshot stay untouched.
- An account can hold up to 50 custom fields. Fields that would go past that are left off and listed on the result screen.
Only the fields travel, never the values your contacts have in them.
Automations arrive paused too by default, for the same reason. Anything in a step that pointed at your own account — a client account it was aimed at, a chosen smart list, a calendar event, a database connection — is cleared on the way in, because those choices mean nothing in the target account. Where a step or a trigger used one of your AI agents, it is re-pointed at the copy of that agent the same snapshot just installed. Tags are kept, because tags work by name and mean the same on every account, and so are plain values you typed into a step, such as the phone number an alert goes to, so check those still fit the client. Open each automation on the target account, fill in whatever was cleared, then switch it on. The result screen names any automation that still needs an agent picked. If the automations in a snapshot need no filling in at all, you can have them arrive running instead: see below.
Automations that arrive switched on
By default the automations a snapshot carries land paused, so the client (or you, on their behalf) can read them over before anything runs. Switch automations on when installed, the checkbox under Include automations in the New snapshot window, changes that: the automations arrive switched on in the client’s account and start working straight away.
- It applies to your own client accounts only, on all three ways a snapshot reaches them: applying it to one account, applying it to several at once, and the starred snapshot that installs on every new client. Someone installing your snapshot from a share link always gets the automations paused, whatever this box says.
- AI agents are not affected. They still arrive inactive, and you still connect the client’s channels and switch each agent on yourself.
- The account-specific choices are still cleared on the way in, exactly as described above. So only tick the box when the automations in the snapshot work with nothing filled in. A good example is an alert that has nothing to point at: when a message fails to send, create a task. An automation that still needs a smart list, a calendar event, a database connection or an agent picked is not something to let loose unattended.
- An automation that can’t be switched on safely stays paused, even with the box ticked, and the result screen tells you which ones are waiting for you.
- The runs are paid for by the client’s account, 0.25 credits per run like any other automation. An automation that fires often is spending their balance from the moment they land, so keep an eye on what you set running.
- You can change your mind later without rebuilding the snapshot: open the snapshot’s Rename action (the pencil on its row) and tick or untick the box there. It takes effect on the installs you do from then on, and never changes an automation already installed somewhere.
Applying to several clients at once
The Install into list lets you tick as many accounts as you like. Use Select all sub-accounts to re-template your whole client base in one go, then click Apply to N accounts. Each account is processed in turn and the window shows the result per account — installed, skipped, or failed with the reason — so one account that could not be set up never stops the others.
Skip accounts that already have this snapshot is on by default: an account that already received this exact snapshot is skipped instead of getting a second copy. Turn it off if you deliberately want another copy. Copies installed before September 2026 are not recognised by this check, so accounts templated before then are treated as new.
Installing a Snapshot on Every New Client Automatically
If you always start clients from the same setup, you don’t have to apply the snapshot by hand each time. Star one snapshot as your default and every new client account you create arrives with it already installed.
- Open Snapshots.
- Click the star in the New clients column on the snapshot you want.
The starred row shows a Default badge. Only one snapshot can be the default — starring another moves it. Click the star again to turn it off, and new accounts go back to arriving empty.
This applies to every way a client account gets created:
- You create it yourself on the Sub Accounts page.
- Your integration creates it through the API.
- A client buys through your own checkout link and their account is created automatically.
That last one is the point of the feature: a client can pay on your website and land in your branded dashboard with your agent, knowledge base, tools and media already there, without you touching anything.
A few things worth knowing:
- Installed agents still start paused, exactly as they do with a manual apply — you connect the client’s channels first, then switch the agent on.
- The pipelines in the snapshot land on every new client too. A brand-new account has no board of its own yet, so it arrives with your stages, stage colours and trigger tags already in place.
- The custom fields in the snapshot are added to every new client too, so their contacts have the same fields as yours from day one.
- When you add a client yourself, you can pick a different snapshot for that one client, or No template, in the Template section of the Add sub-account window. See Picking a template for one client below.
- The install runs right after the account is created. If it can’t complete for any reason, the client’s account is still created and usable — it just arrives empty, and you can apply the snapshot manually.
- Deleting the starred snapshot clears the default automatically.
Picking a template for one client
Different clients often need different setups: a restaurant, a real estate agency and a clinic each want their own agent, fields and pipeline. Capture one snapshot per niche, then choose the right one when you add the client:
- On the Sub Accounts page, click Add sub-account.
- On the Features step, open the Template section. It lists all your snapshots, with your default one marked (default) and already selected.
- Pick the snapshot for this client, or No template to create the account empty.
- Finish and click Create account.
The template installs right after the account is created, exactly like the default does, including the rule that installed agents start paused. If you saved packages, a package can remember a template too, so picking the package also picks its template.
Creating an account through the API works the same way: send snapshot_id with one of your snapshot ids to use that template, or null for no template. Leave it out and your default snapshot is used, as before.
Put the automations every client should have in this snapshot. Anything you find yourself building in account after account belongs here, and a snapshot can carry automations without an agent, so a workflow-only default is fine. A good first one: create a task when a message fails to send, so a number that stops delivering gets noticed on the client’s board instead of going quiet. The automations arrive paused, so open the client’s account once and switch them on, or tick Switch automations on when installed on the snapshot and they arrive already running.
Sharing a Snapshot with a Link
You can hand a snapshot to anyone with an account on the platform — a partner agency, a client who runs their own account, or the community — without them being one of your sub-accounts. Nothing account-specific travels with it, and you can stop sharing at any time.
- Click Share on a snapshot.
- Choose who can install it:
- Anyone with the link.
- Champions Circle members only — the link only works for accounts that are members of the community.
- Click Create link and copy it.
Before you send the link, read the Before you share checklist in the same window. It lists:
- Fill-in fields the installer will be asked for (see below).
- Custom functions to review — each function’s web address is shown, because it points at your systems. Any header values the function sends (API keys, tokens) are cleared in the installed copy; the header names stay so the installer knows what to fill in. The installer sees the same list and is told to review those functions before switching the agent on.
- MCP servers that need their key again — API keys for your connected MCP servers are never included in a shared install. They land switched off on the installer’s account, and the installer enters their own key.
- Pipelines that ride along, if the snapshot carries any, each named with the number of stages and trigger tags inside it. They only land on an account that has no pipeline of its own yet, and their trigger tags are recreated by name, so a tag already used by another stage on the installer’s account is left off.
- Automations that ride along, if the snapshot carries any, listed by name. They always install paused, whatever Switch automations on when installed says, and a shared install strips more out of them than an install inside your own agency does: on top of the account-specific choices that are always cleared (client account, smart list, calendar event, database connection), every secret and connection detail goes — webhook secrets, the header values a step sends, and any field holding a key, token or password. Field names stay, so the installer can see what to fill in.
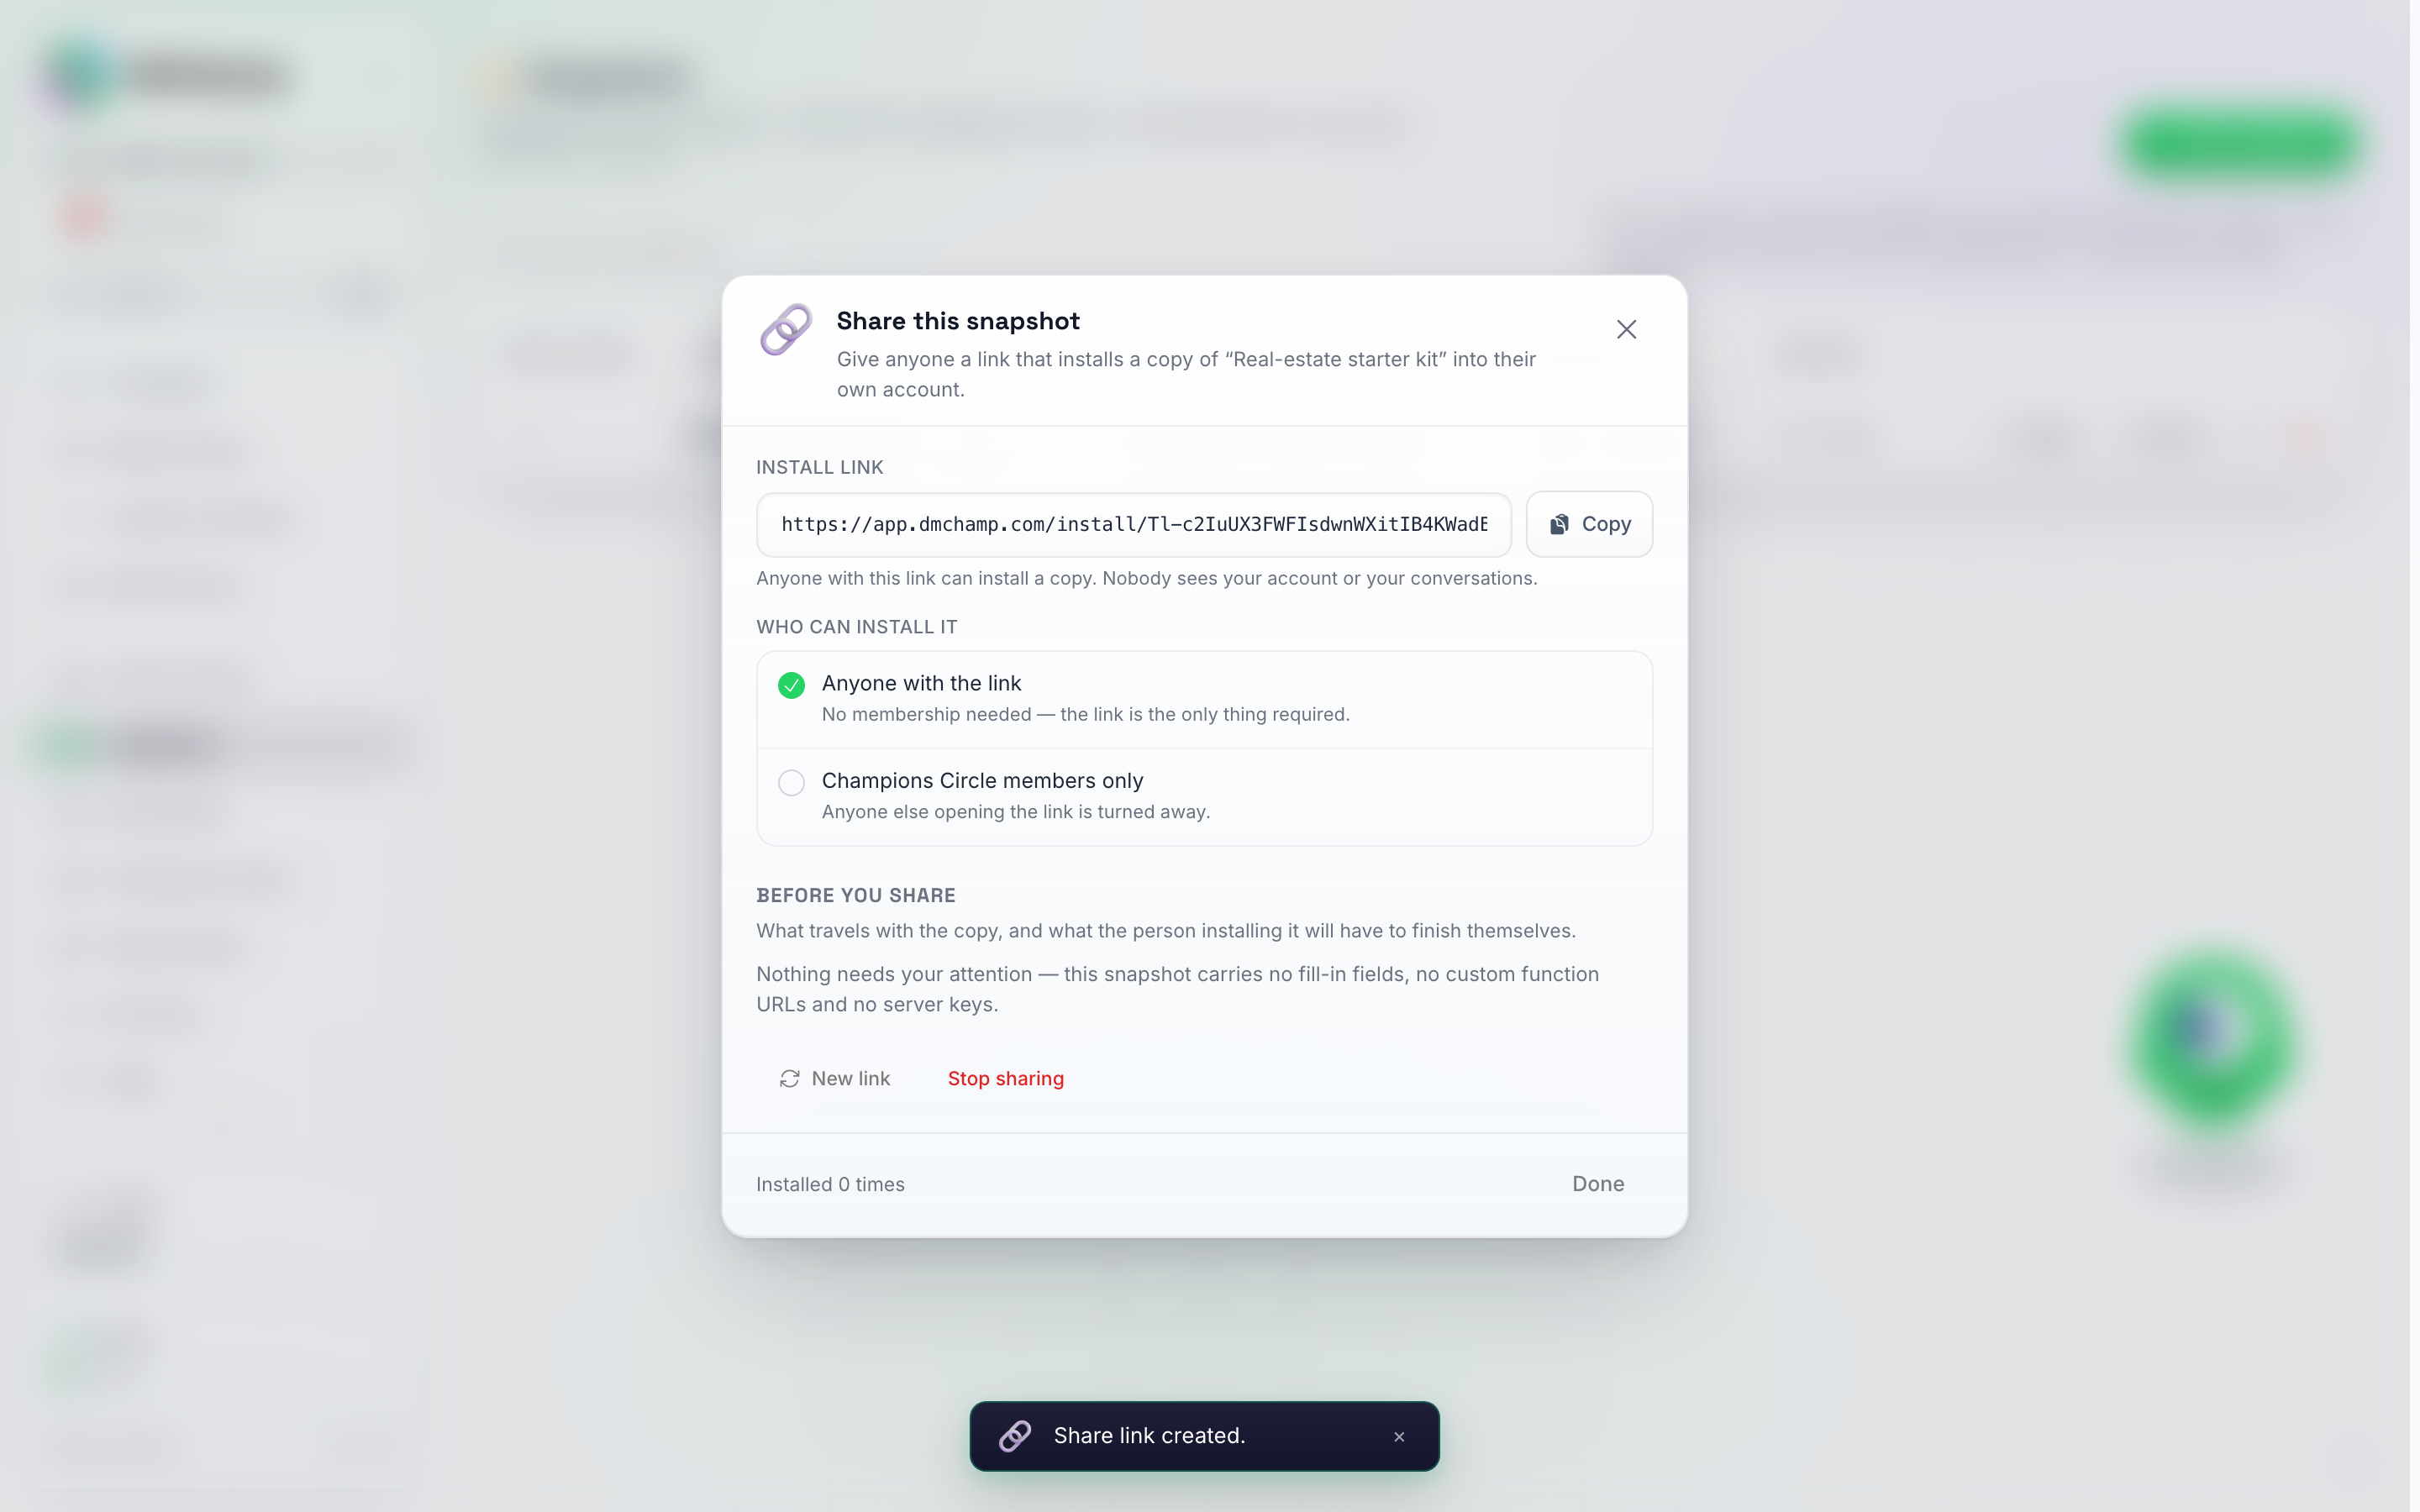
The Share window after Create link: copy the link, choose who can install it, read the checklist, and use New link or Stop sharing when you need to cut access.
The row shows how many times the snapshot has been installed. New link gives you a fresh link and makes the old one stop working; Stop sharing turns the link off altogether. Both leave every copy that was already installed untouched.
Fill-in fields
Write {{company_name}}, {{support_email}}, {{website}}, {{booking_link}} or any other {{word}} in the agent’s instructions, FAQs or media descriptions and it becomes a field the installer fills in before installing. The installer’s values replace the fields everywhere in the copy; your original snapshot is untouched.
{{first_name}} and {{personal_context}} are the AI’s own message variables, so they are left alone and never turned into a fill-in field.
Installing a Snapshot Someone Shared with You
Open the link you were sent while signed in (or sign in when asked — you land back on the install page afterwards). You see the snapshot’s name, who shared it, the agents it contains and what is inside, then:
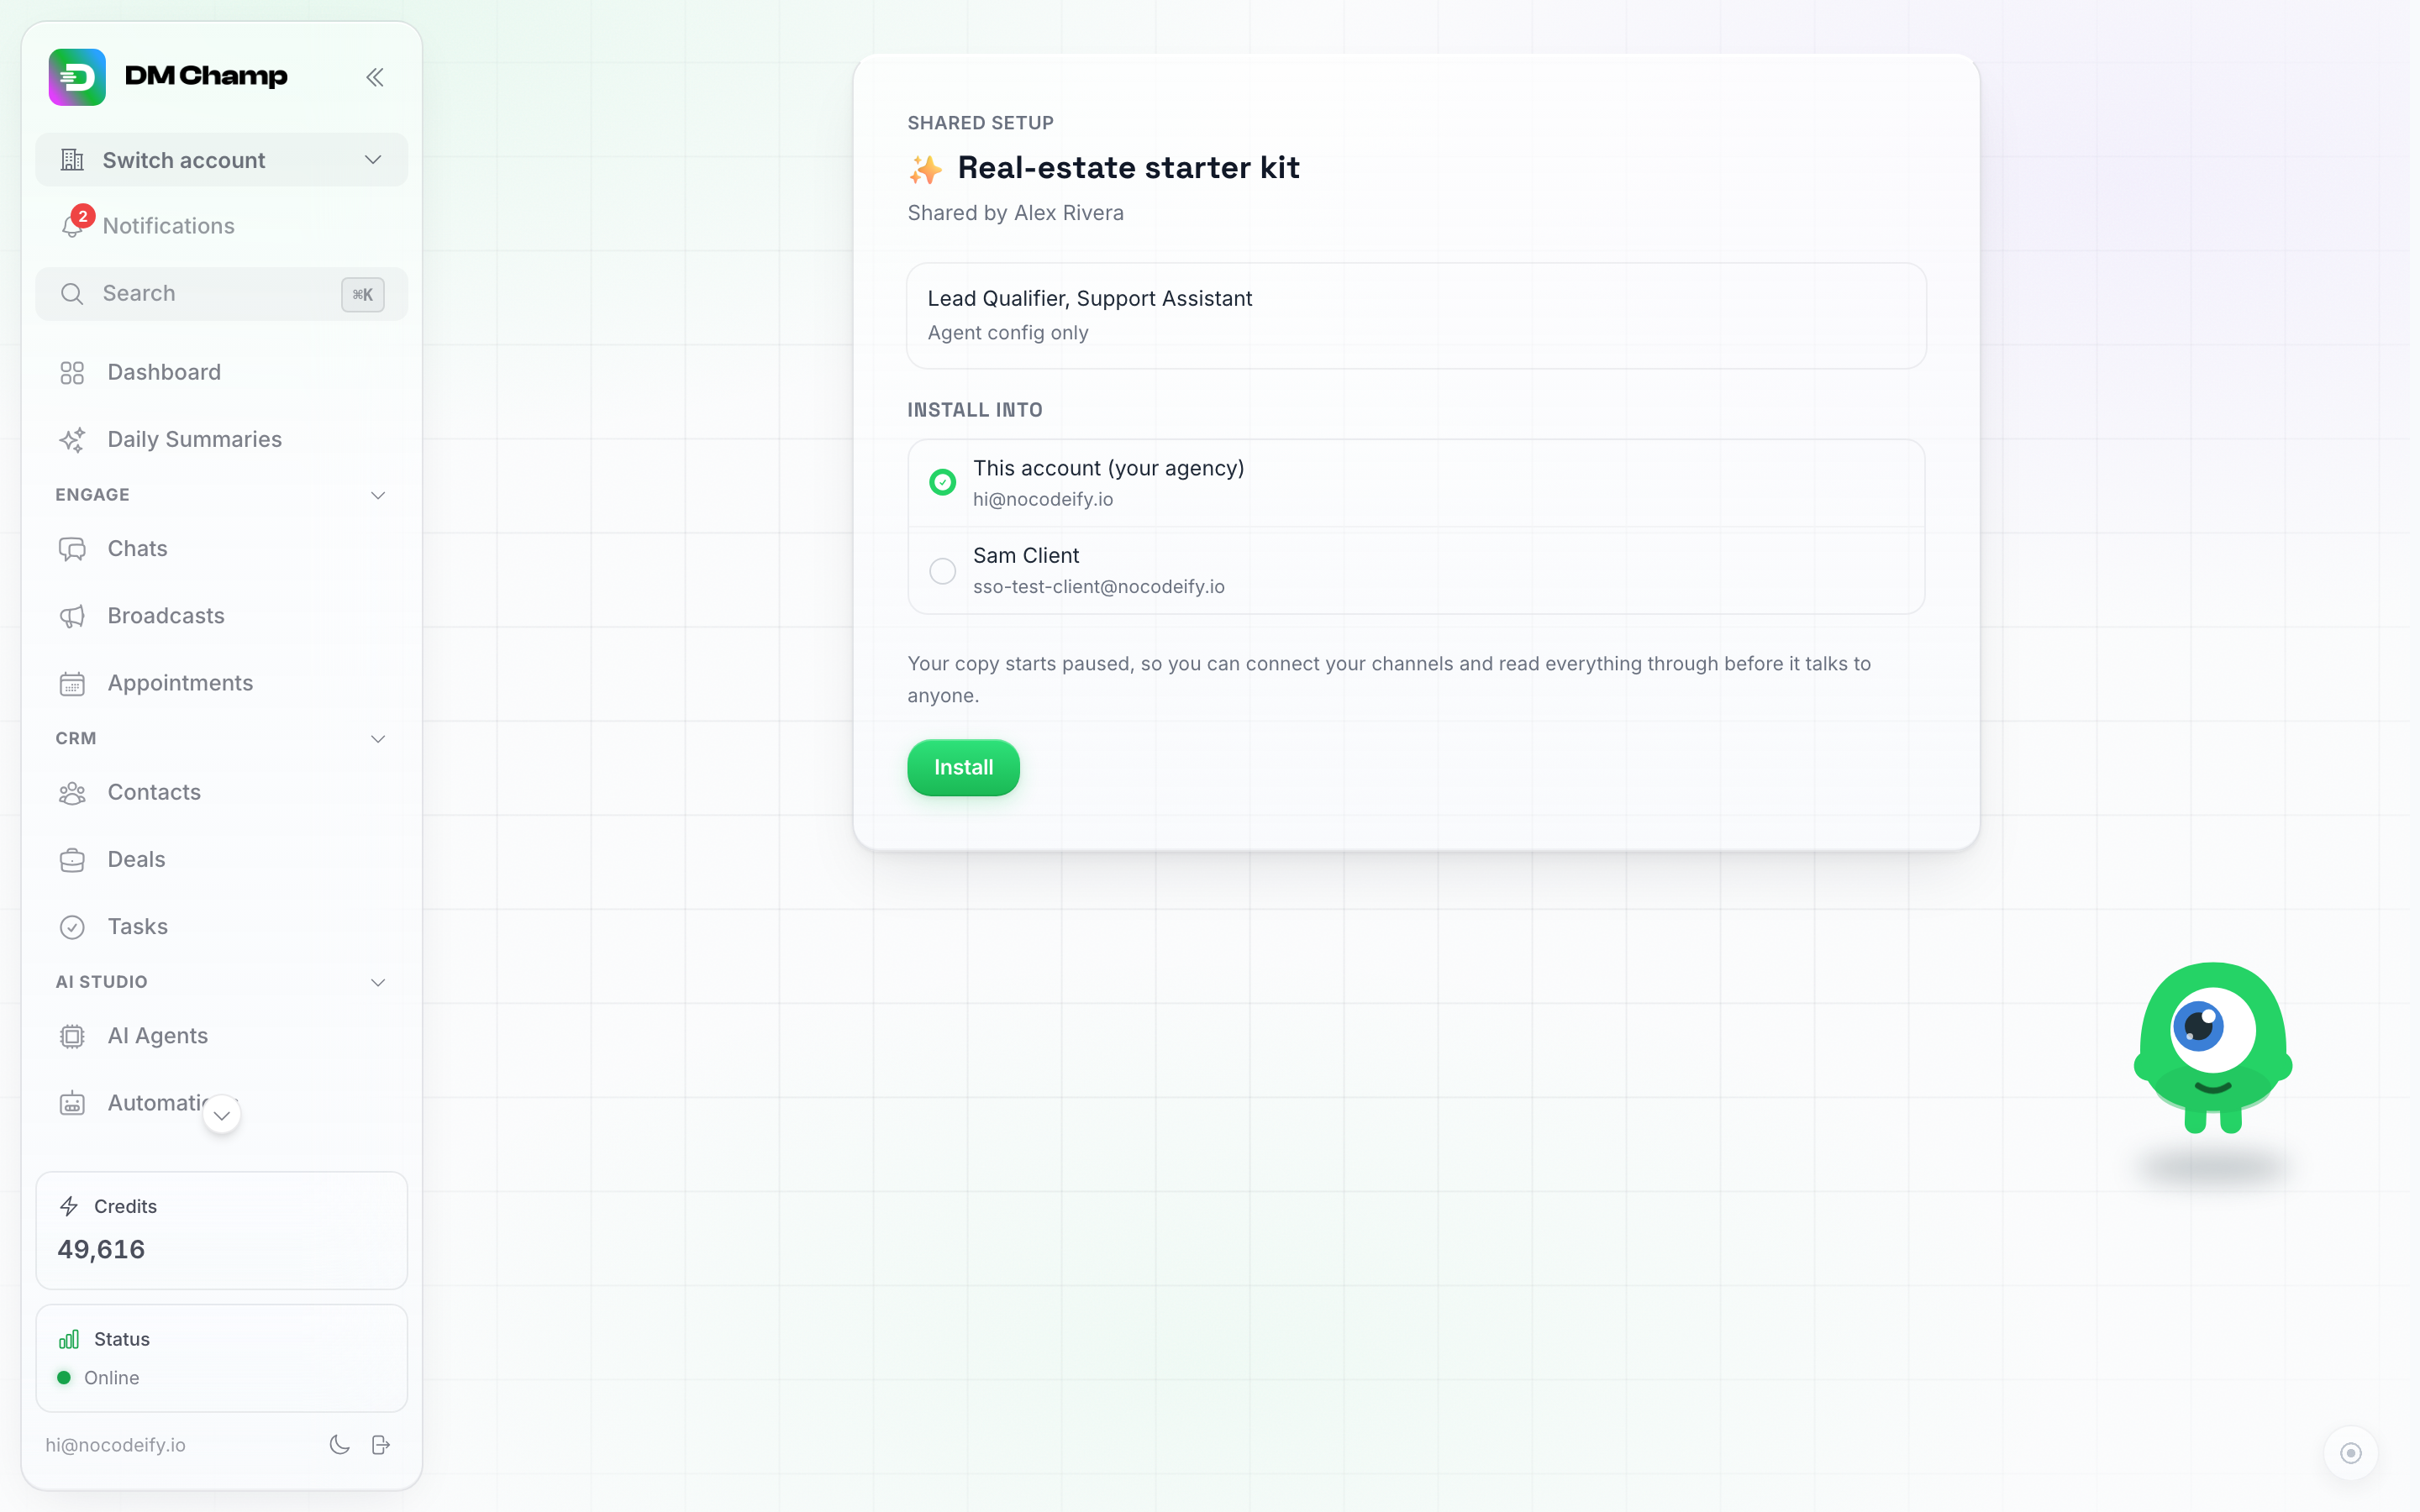
The install page. You see what is inside and who shared it, pick where it goes, and click Install.
- Fill in any fields the author left for you, such as your company name or website. All of them are optional.
- Pick where to install it — your own account, or one of your sub-accounts if you run an agency.
- Click Install.
The agents are copied into the account you picked and start paused, exactly like a snapshot applied from the Snapshots page. Before switching them on:
- Connect your own channels and point them at the new agents.
- Review any custom functions listed on the confirmation screen — they call the author’s web addresses.
- Enter your own key on any MCP server listed there, then switch it on.
- Reconnect a calendar if the agent books appointments.
- Check the Deals page if the snapshot carried pipelines. They arrive only if the account you installed into had no board of its own yet, and the confirmation screen tells you what landed and what was left off.
- Open any automations that came with it. They are always paused, and everything account-specific in them has been cleared — the account a step pointed at, smart lists, calendar events, database connections, and every secret, key or header value the original used. Fill in your own, then enable them.
Installing counts towards your account’s agent limit like any other agent you create.
Managing Snapshots
- Rename — the pencil icon on a row. The same window carries Switch automations on when installed, so you can turn that on or off on a snapshot you already built (see Automations that arrive switched on).
- Delete — removes the snapshot and its stored files. Accounts you applied it to are unaffected: everything that was installed stays installed.
See and edit what a snapshot contains
Click View contents on a snapshot’s row to see everything it installs, listed by name:
- Agents
- FAQs, including the ones that came from a knowledge source
- Knowledge sources
- Custom functions
- MCP servers
- Media
- Automations
- Pipelines, with their stages
- Custom fields, with their type
To leave something out of future installs, click the bin icon next to it and confirm with Remove. Accounts you already applied the snapshot to keep what they received. An agent that one of the snapshot’s automations uses can’t be removed until you remove that automation first.
To add something the snapshot doesn’t have yet, click Add item. You see the agents, automations, pipelines and custom fields of the account the snapshot was captured from, grouped by type. Items already in the snapshot are greyed out as Already included. Click Add next to the one you want and it joins the snapshot right away. An added agent comes with its FAQs, knowledge sources, custom functions, MCP servers and media.
To bring one item up to date, click the refresh icon next to an agent, automation, pipeline or custom field. The snapshot takes the current version of that item from the account it was captured from, and the item must still exist there. Updating an agent asks you to confirm first, because it replaces the whole agent in the snapshot, including its FAQs and knowledge. That is also how a new FAQ reaches an existing snapshot: add the FAQ to the agent, then update the agent in the snapshot.
Adding, updating and removing only change the snapshot. Accounts you already applied it to keep what they received.
Limits:
- FAQs, knowledge sources, custom functions, MCP servers and media are added and updated together with their agent, not one by one.
- A pipeline needs at least one stage to be added.
What’s Not Included
- Channel connections and phone numbers (always account-specific).
- Calendars and appointment connections.
- OAuth logins for connected integrations.
- Contacts, chats, deals, and conversation history — snapshots carry your setup, never customer data. A pipeline travels as an empty board: its stages and trigger tags, none of the deals on it.
- WhatsApp message templates (these are approved per account and must be re-created on the target).
- API keys of MCP servers and header values of custom functions, when a snapshot is installed from a share link (within your own agency they are copied).
- The account-specific choices inside an automation — the client account a step pointed at, smart lists, calendar events and database connections — and, on a share-link install, its secrets and header values too.