White-Label Quickstart
A focused, six-step path from “I just upgraded to Agency” to a fully branded platform your first client can log in to. No rabbit holes, no advanced settings — just the shortest line between a generic dashboard and a product that looks like yours.
Each step has a time estimate and a link to the deeper page if you want more detail later. Plan for about half an hour of your time, plus up to an hour of waiting for DNS to go live in the background. If you hit a wall on any step, skip ahead — you can come back to it.
Prefer to see it? Click through the whole flow:
What you’ll have at the end
- Your own custom domain (for example,
app.youragency.com) pointing at the platform - A valid security certificate (the padlock icon in the browser)
- Your company name, logo, icon (favicon), colours, and SEO text replacing the defaults
- A clear decision made on how you’ll onboard clients (managed vs. reselling)
- One test sub-account logged in at your custom domain
Once that’s working, every new client gets the same branded experience automatically — you only do this setup once.
Before you start
You need to be on the Agency subscription tier. White-labeling is not available on lower tiers. If you’re not on Agency yet, go to Settings → Billing (under Workspace) and upgrade first — the White Labeling entry won’t appear under Settings → Advanced until you do.
You’ll also need:
- A domain you own (or a subdomain on a domain you own). Most agencies use something like
app.youragency.comrather than the bareyouragency.com, so the marketing site and the app stay separate. - Access to your domain registrar (GoDaddy, Cloudflare, Namecheap, etc.) — specifically, the DNS settings page. If you don’t have the login, get it before you start.
- Two image files for your brand:
- Logo — a horizontal logo, PNG, WebP, or SVG, up to 5 MB.
- Favicon — a square icon used as the browser-tab favicon, PNG, WebP, or SVG, up to 5 MB. 256×256 pixels works well.
Step 1 — Decide how you’ll onboard clients (≈ 5 min)
Before you touch any settings, make a decision: how are clients going to pay and sign up? This affects how the rest of the journey feels.
- Managed mode. You create each sub-account yourself from the Sub Accounts page. You invoice the client off-platform (bank transfer, your accounting tool, whatever you already use). The client never sees a pricing page. Best for done-for-you setups, countries Stripe doesn’t serve, or agencies with existing invoicing.
- Reselling mode. Clients sign up themselves through a payment link, set up in SaaS Mode. They pay via your connected Stripe account with your markup applied automatically. Best for self-serve at scale and productised packages.
You don’t have to commit forever — but switching a single sub-account between modes later requires manual work. Pick the model that fits most of your clients. Full breakdown: Managing Client Sub-Accounts.
Step 2 — Pick your custom domain (≈ 2 min)
Decide the exact web address your clients will use to log in. A few rules of thumb:
- A subdomain is simpler.
app.youragency.comis the standard. Keepyouragency.comfor your marketing site — it’s a single DNS record, versus two (and more fragile if you change DNS providers) for a bare/apex domain. - Keep it short and obvious.
app.,platform.,dash., orclients.all work. Avoid clever names that clients have to remember. - You can run up to three white labels. Most agencies only need one, but you can add up to three domains on the same agency account, each with its own domain, branding, and email sending — a second brand for a different market, or a Lead Finder domain for your clients. Extra domains beyond your first come with the Champions Circle. This quickstart sets up your first one; see Up to Three White Labels for adding more.
Write the chosen domain down — you’ll paste it in the next step.
Step 3 — Add the domain in your dashboard (≈ 2 min)
- In the main sidebar, click Settings (near the bottom, below Sub Accounts).
- In the Settings menu, scroll to the Advanced group and click White Labeling.
- Scroll to the Custom domain card.
- In the App domain field, type the domain you picked in Step 2 (for example
app.youragency.com). Do not includehttps://or a trailing slash — just the domain itself. - Click Save.
Once saved, the card shows the CNAME record you need to add at your registrar — your domain on the left, tenants.youraiconnector.com on the right.
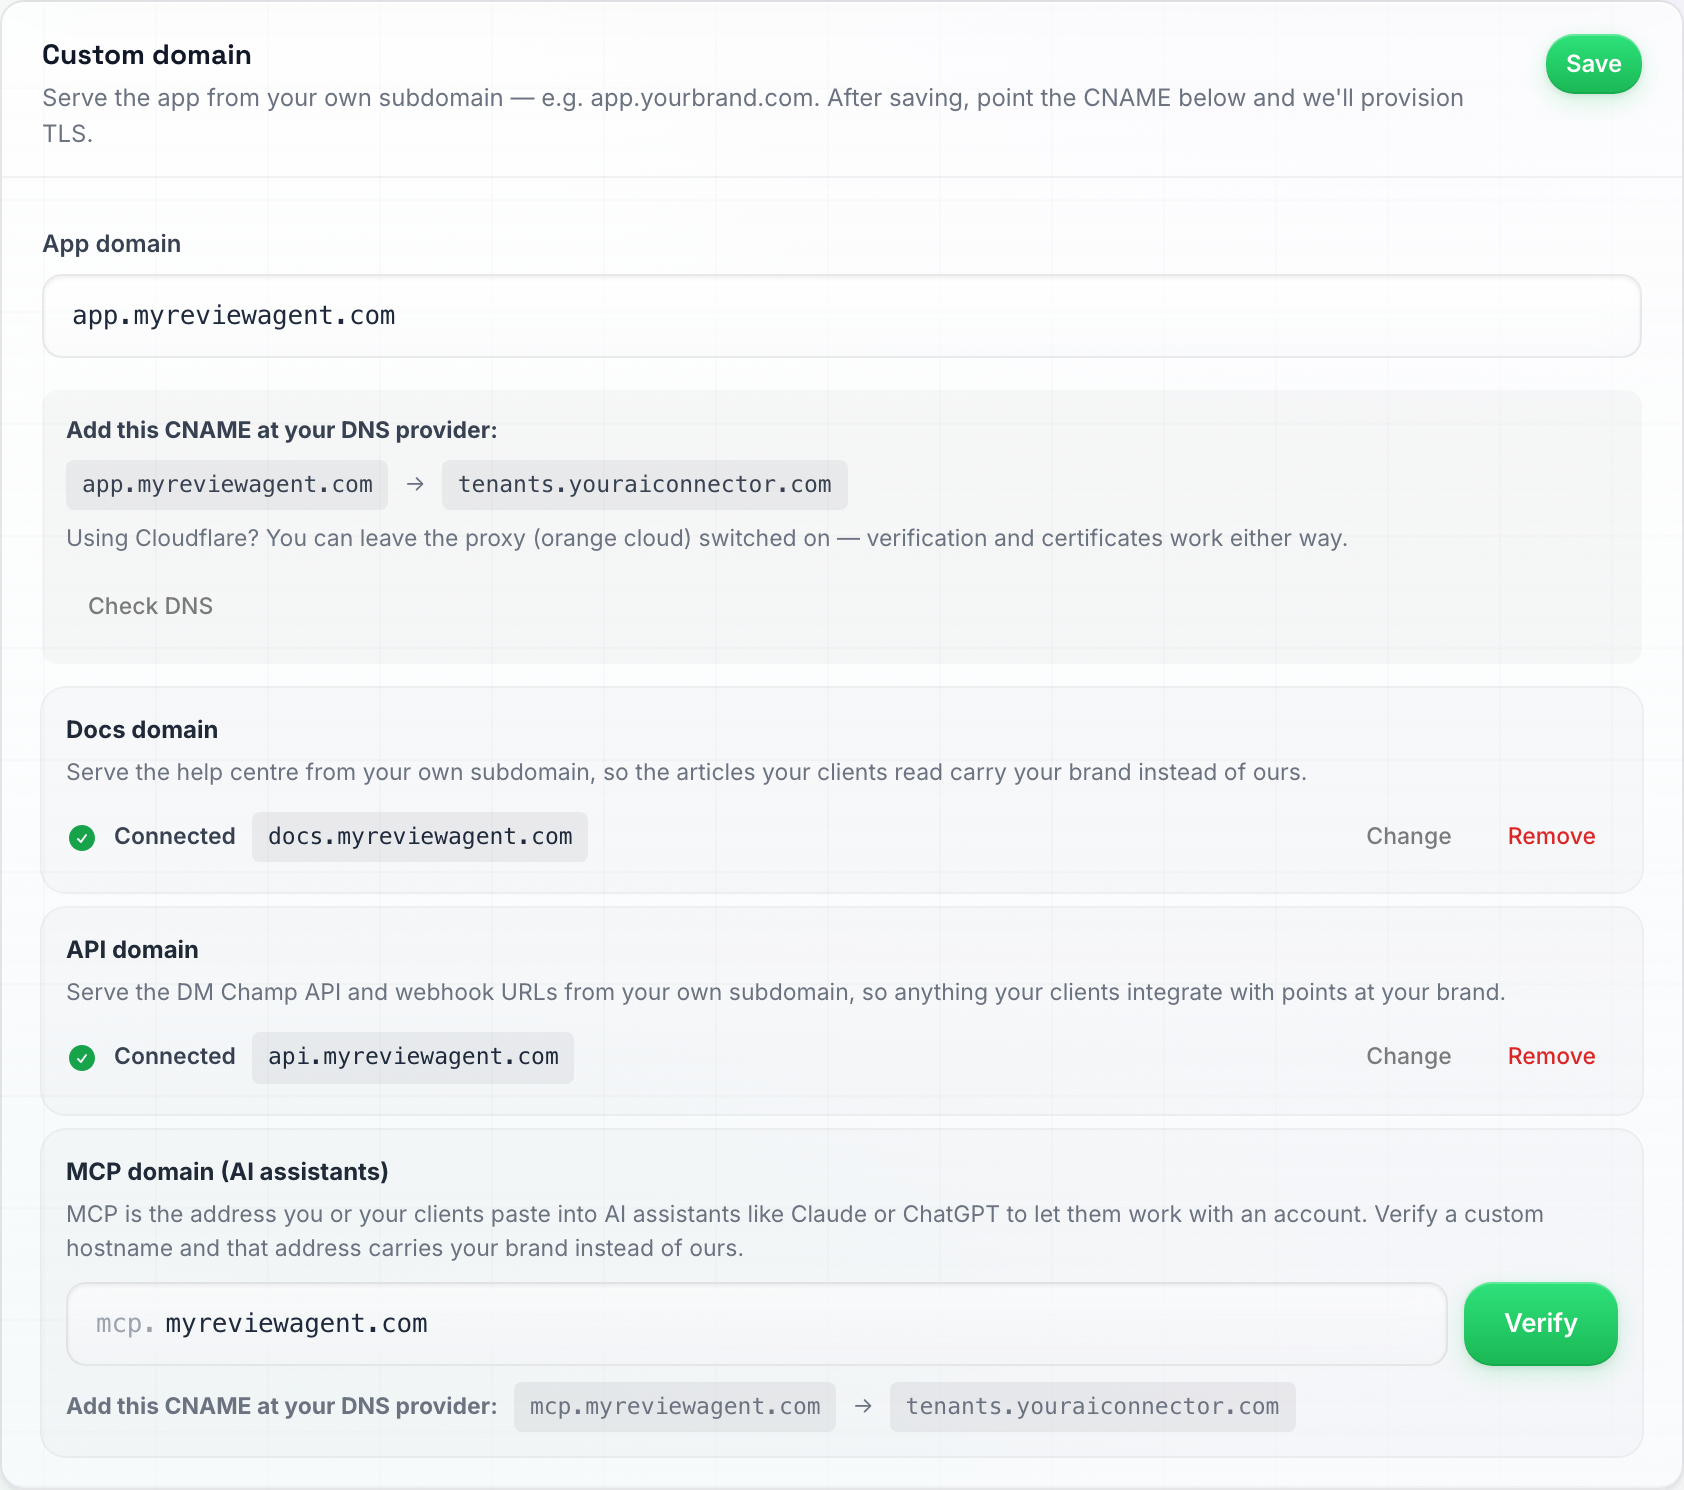
The Custom domain card after saving: your domain, the CNAME target to copy, and the app/API/docs domains once they verify.
Leave this tab open — you’re about to copy that value into your registrar.
Step 4 — Add the DNS record at your registrar (≈ 10 min)
DNS records are the address book of the internet — they tell browsers where to find your custom domain. You’re now telling the world that app.youragency.com should point at the platform.
- Log in to the company where you bought your domain (your “registrar” — GoDaddy, Cloudflare, Namecheap, etc.) in a separate browser tab.
- Find the DNS settings page for your domain. It’s sometimes called “DNS management” or “DNS records.”
- Add a CNAME record:
- Host / Name — for a subdomain like
app.youragency.com, this is usually justappat most registrars (they add the rest automatically). - Value / Target / Points to —
tenants.youraiconnector.com, exactly as shown on the Custom domain card. - Leave TTL at the default (or 3600 / 1 hour if asked).
- Host / Name — for a subdomain like
- Click your registrar’s Save button.
Watch out for conflicts. If a record of the same type already exists for that host (for example, an old A record pointing somewhere else), delete or update it first — two conflicting records will break verification.
On Cloudflare? You can leave the proxy (the orange cloud toggle next to the record) switched on — verification and certificates work either way. One setting does matter though: go to SSL/TLS → Overview and make sure the encryption mode is Full (strict), not Flexible. On Flexible, your domain will refuse to load with a “too many redirects” error.
Do NOT visit your custom domain yet. Visiting before setup is complete can cache a broken page in your browser. Wait until you’ve confirmed it loads the login screen in Step 5.
DNS changes can take anywhere from a few minutes to a few hours to propagate, though most registrars (especially Cloudflare and Namecheap) update within the hour. If it’s still not resolving after a day, double-check the record for typos and re-save it.
Step 5 — Wait for the security certificate (≈ a few minutes to an hour, automatic)
Once your CNAME is live, the platform automatically detects it, verifies ownership, and provisions a security certificate (SSL) for your domain — that’s what gives you the padlock icon in the browser and the https:// prefix.
- You don’t buy or install anything. The certificate is created and renewed for you forever.
- This typically finishes within 5–30 minutes of the DNS record going live.
Once it’s ready, open your custom domain in a new browser tab. You should see the platform’s login screen, served over HTTPS, at your own web address. That’s the technical part done.
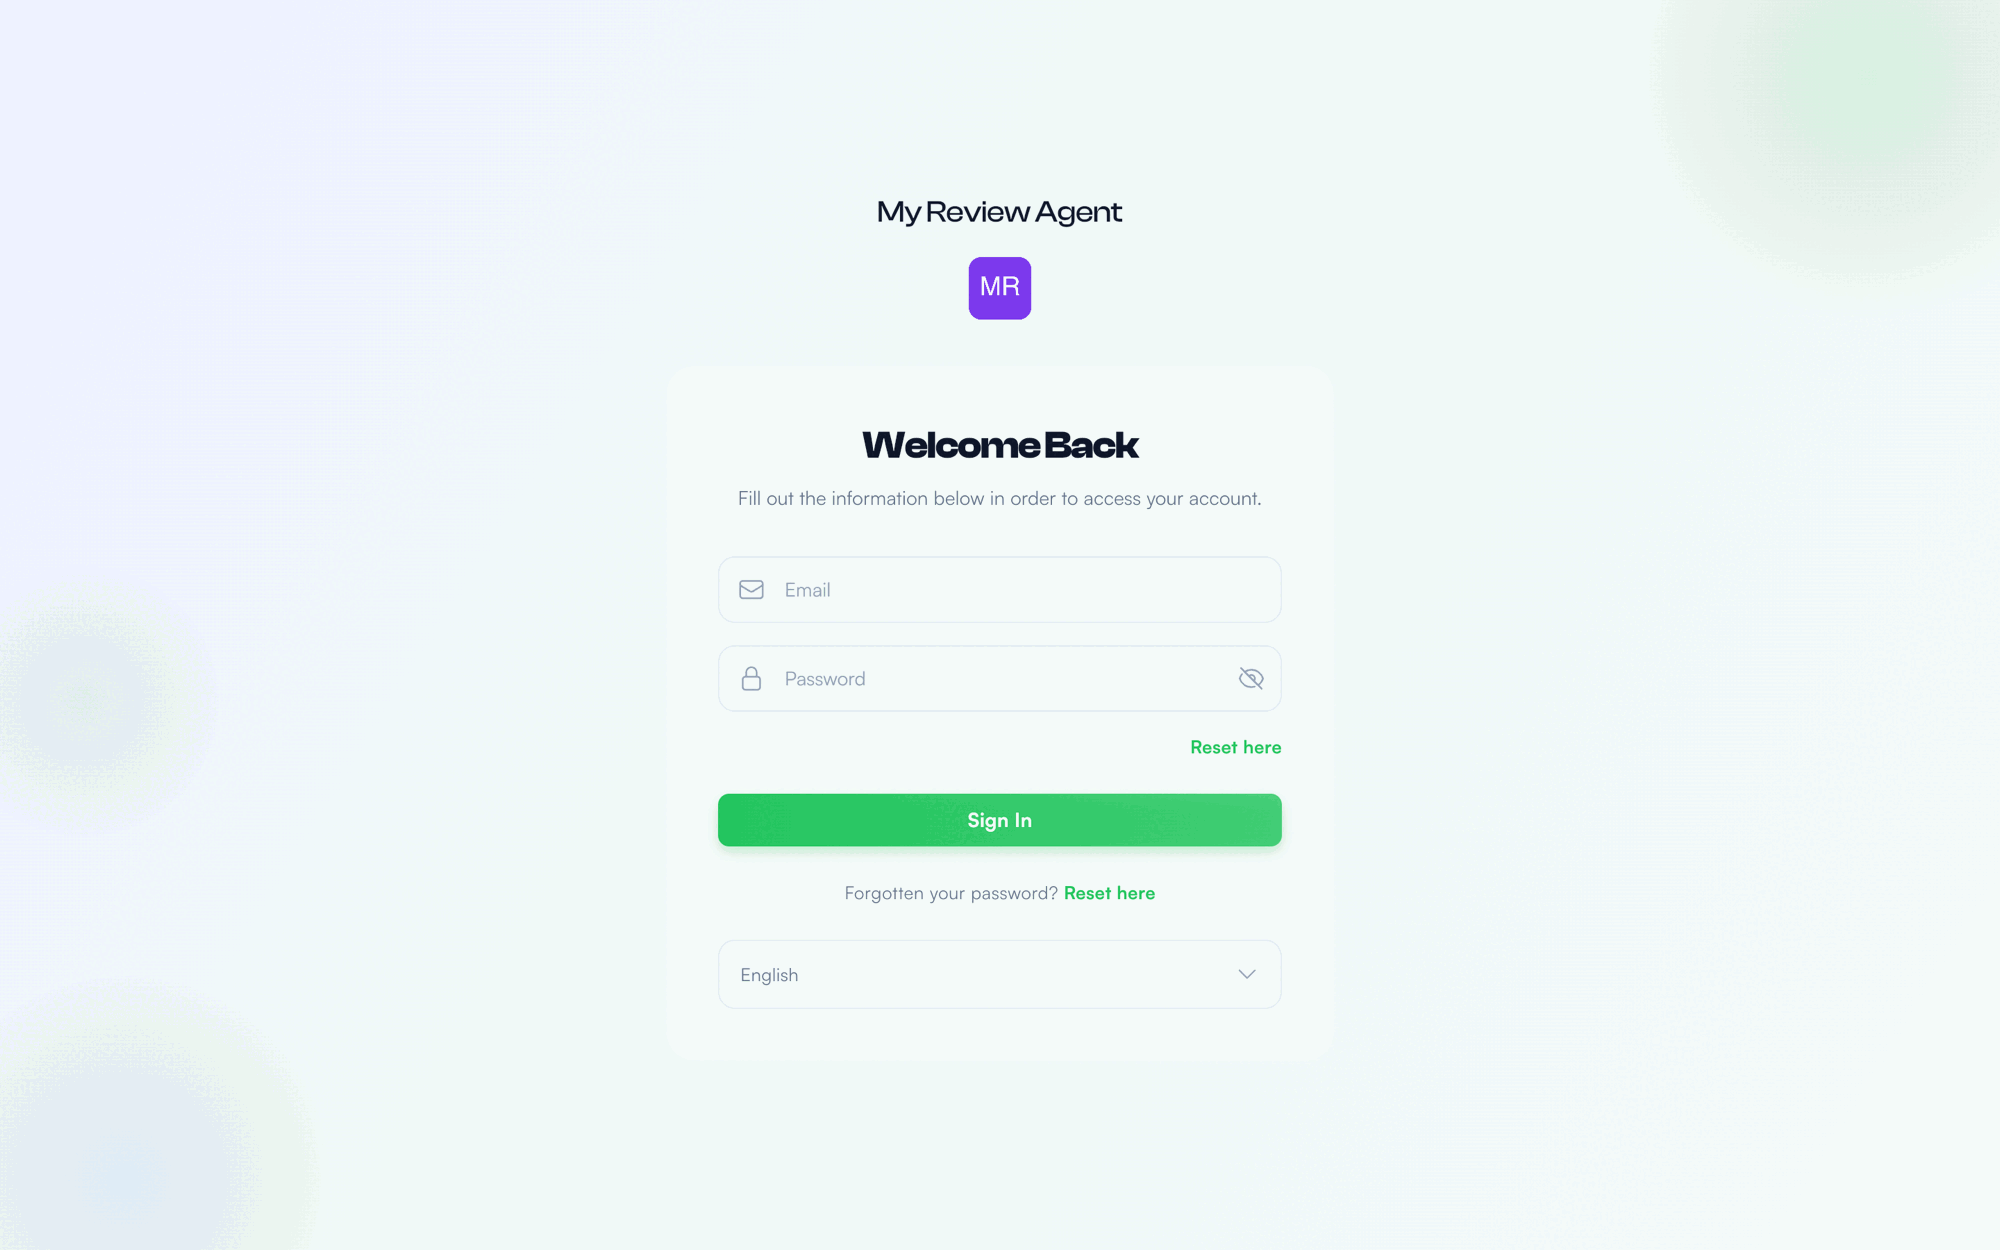
What your clients see: the login page on your own domain, with your name and logo — no trace of us.
Upload your logo before sharing the link. Until a logo is uploaded in the branding step below, the login page shows a broken-image error where the logo belongs. Finish Step 6 before showing the domain to anyone.
Step 6 — Brand the platform (≈ 15 min)
The domain is live, but the platform still shows a neutral placeholder name (“DM Champ”) and our icon. Time to fix that. Everything below is on the same Settings → Advanced → White Labeling panel, in the cards above the Custom domain card.
6a. Brand
In the Brand card, fill in:
- App name — the brand name shown throughout the app, in every email and on the home-screen shortcut. Required: until it is set, they say “DM Champ” instead.
- Company name — your legal/company name, used in footers and emails.
- Support email — where “Contact Support” resolves and the reply-to address on emails to your clients. Set it: your login email is never shown to clients, so without it they have no address to reach you.
- Terms of service URL and Privacy policy URL — your own legal pages. The signup page on your domain links to them; leave them empty and it shows no link (never ours).
- SEO title and SEO description — what shows in browser tabs and search results.
Click Save on the Brand card.
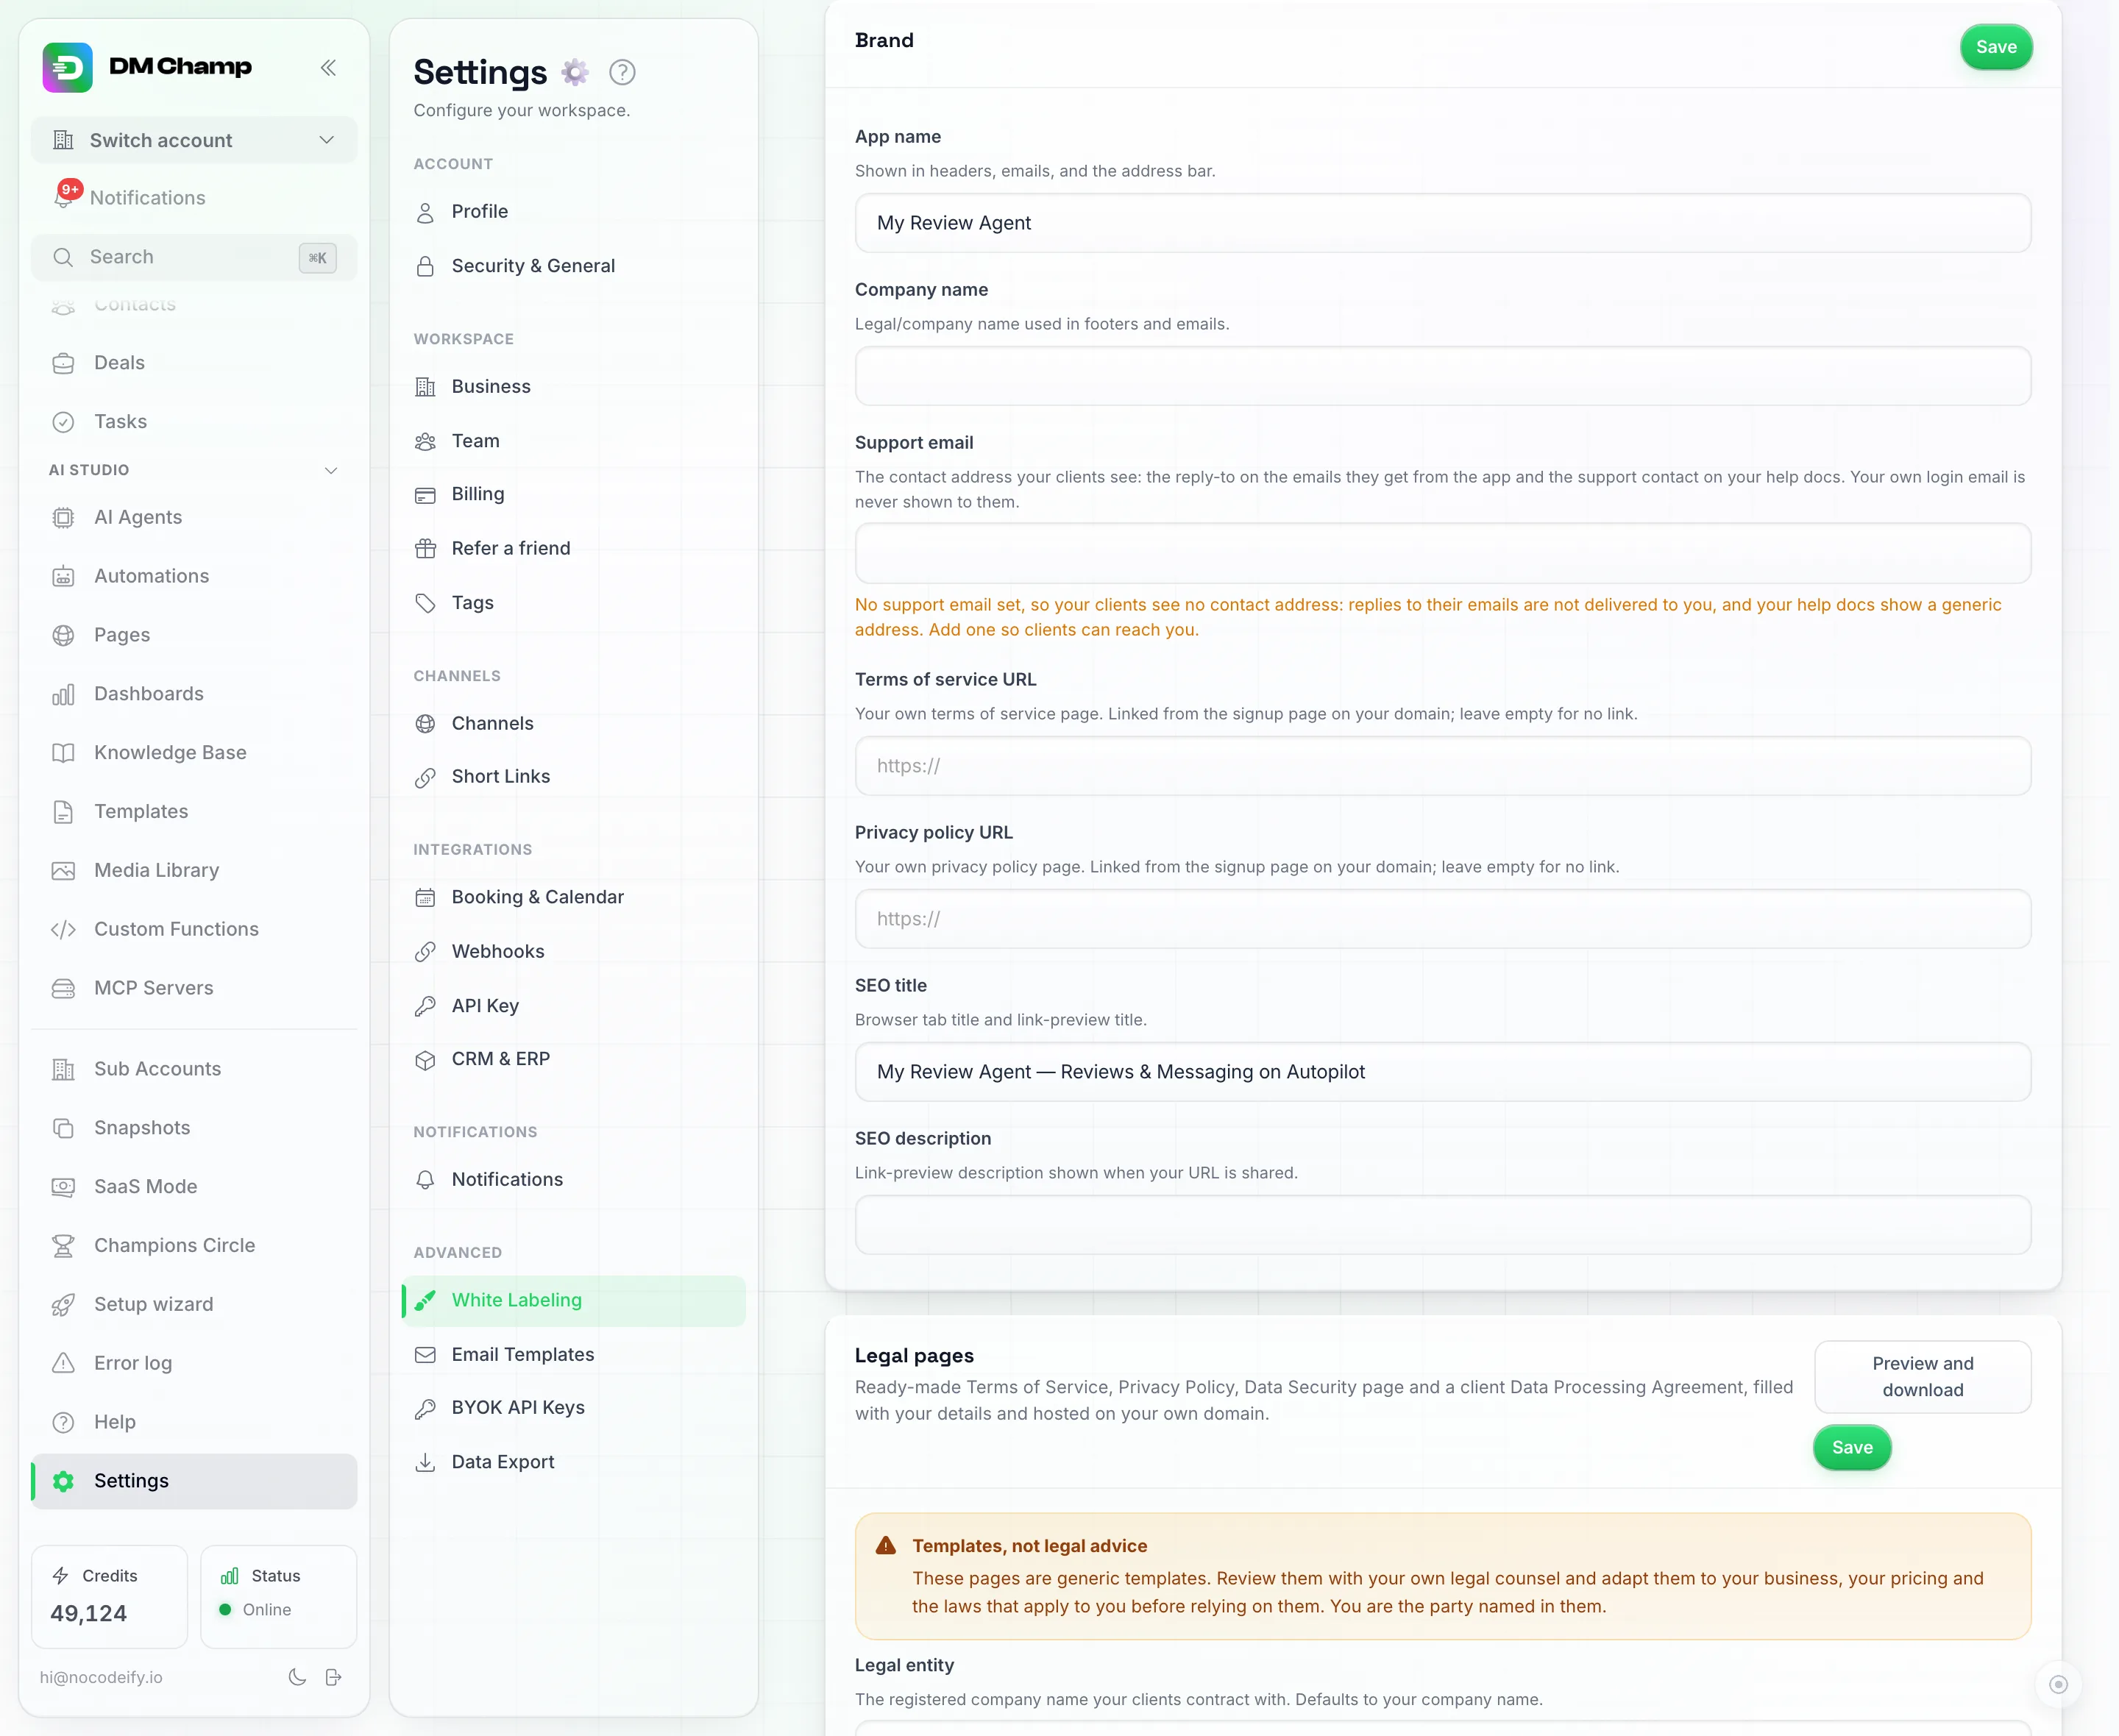
The Brand card — App name, Company name, Support email, Terms of service URL, Privacy policy URL, SEO title and SEO description, all in one Save.
6b. Logo & favicon
In the Logo & Favicon card, click Upload under Logo and pick your horizontal logo (PNG/WebP/SVG, up to 5 MB). Do the same for Favicon (square, 256×256 works well). These save immediately on upload — no separate Save button.
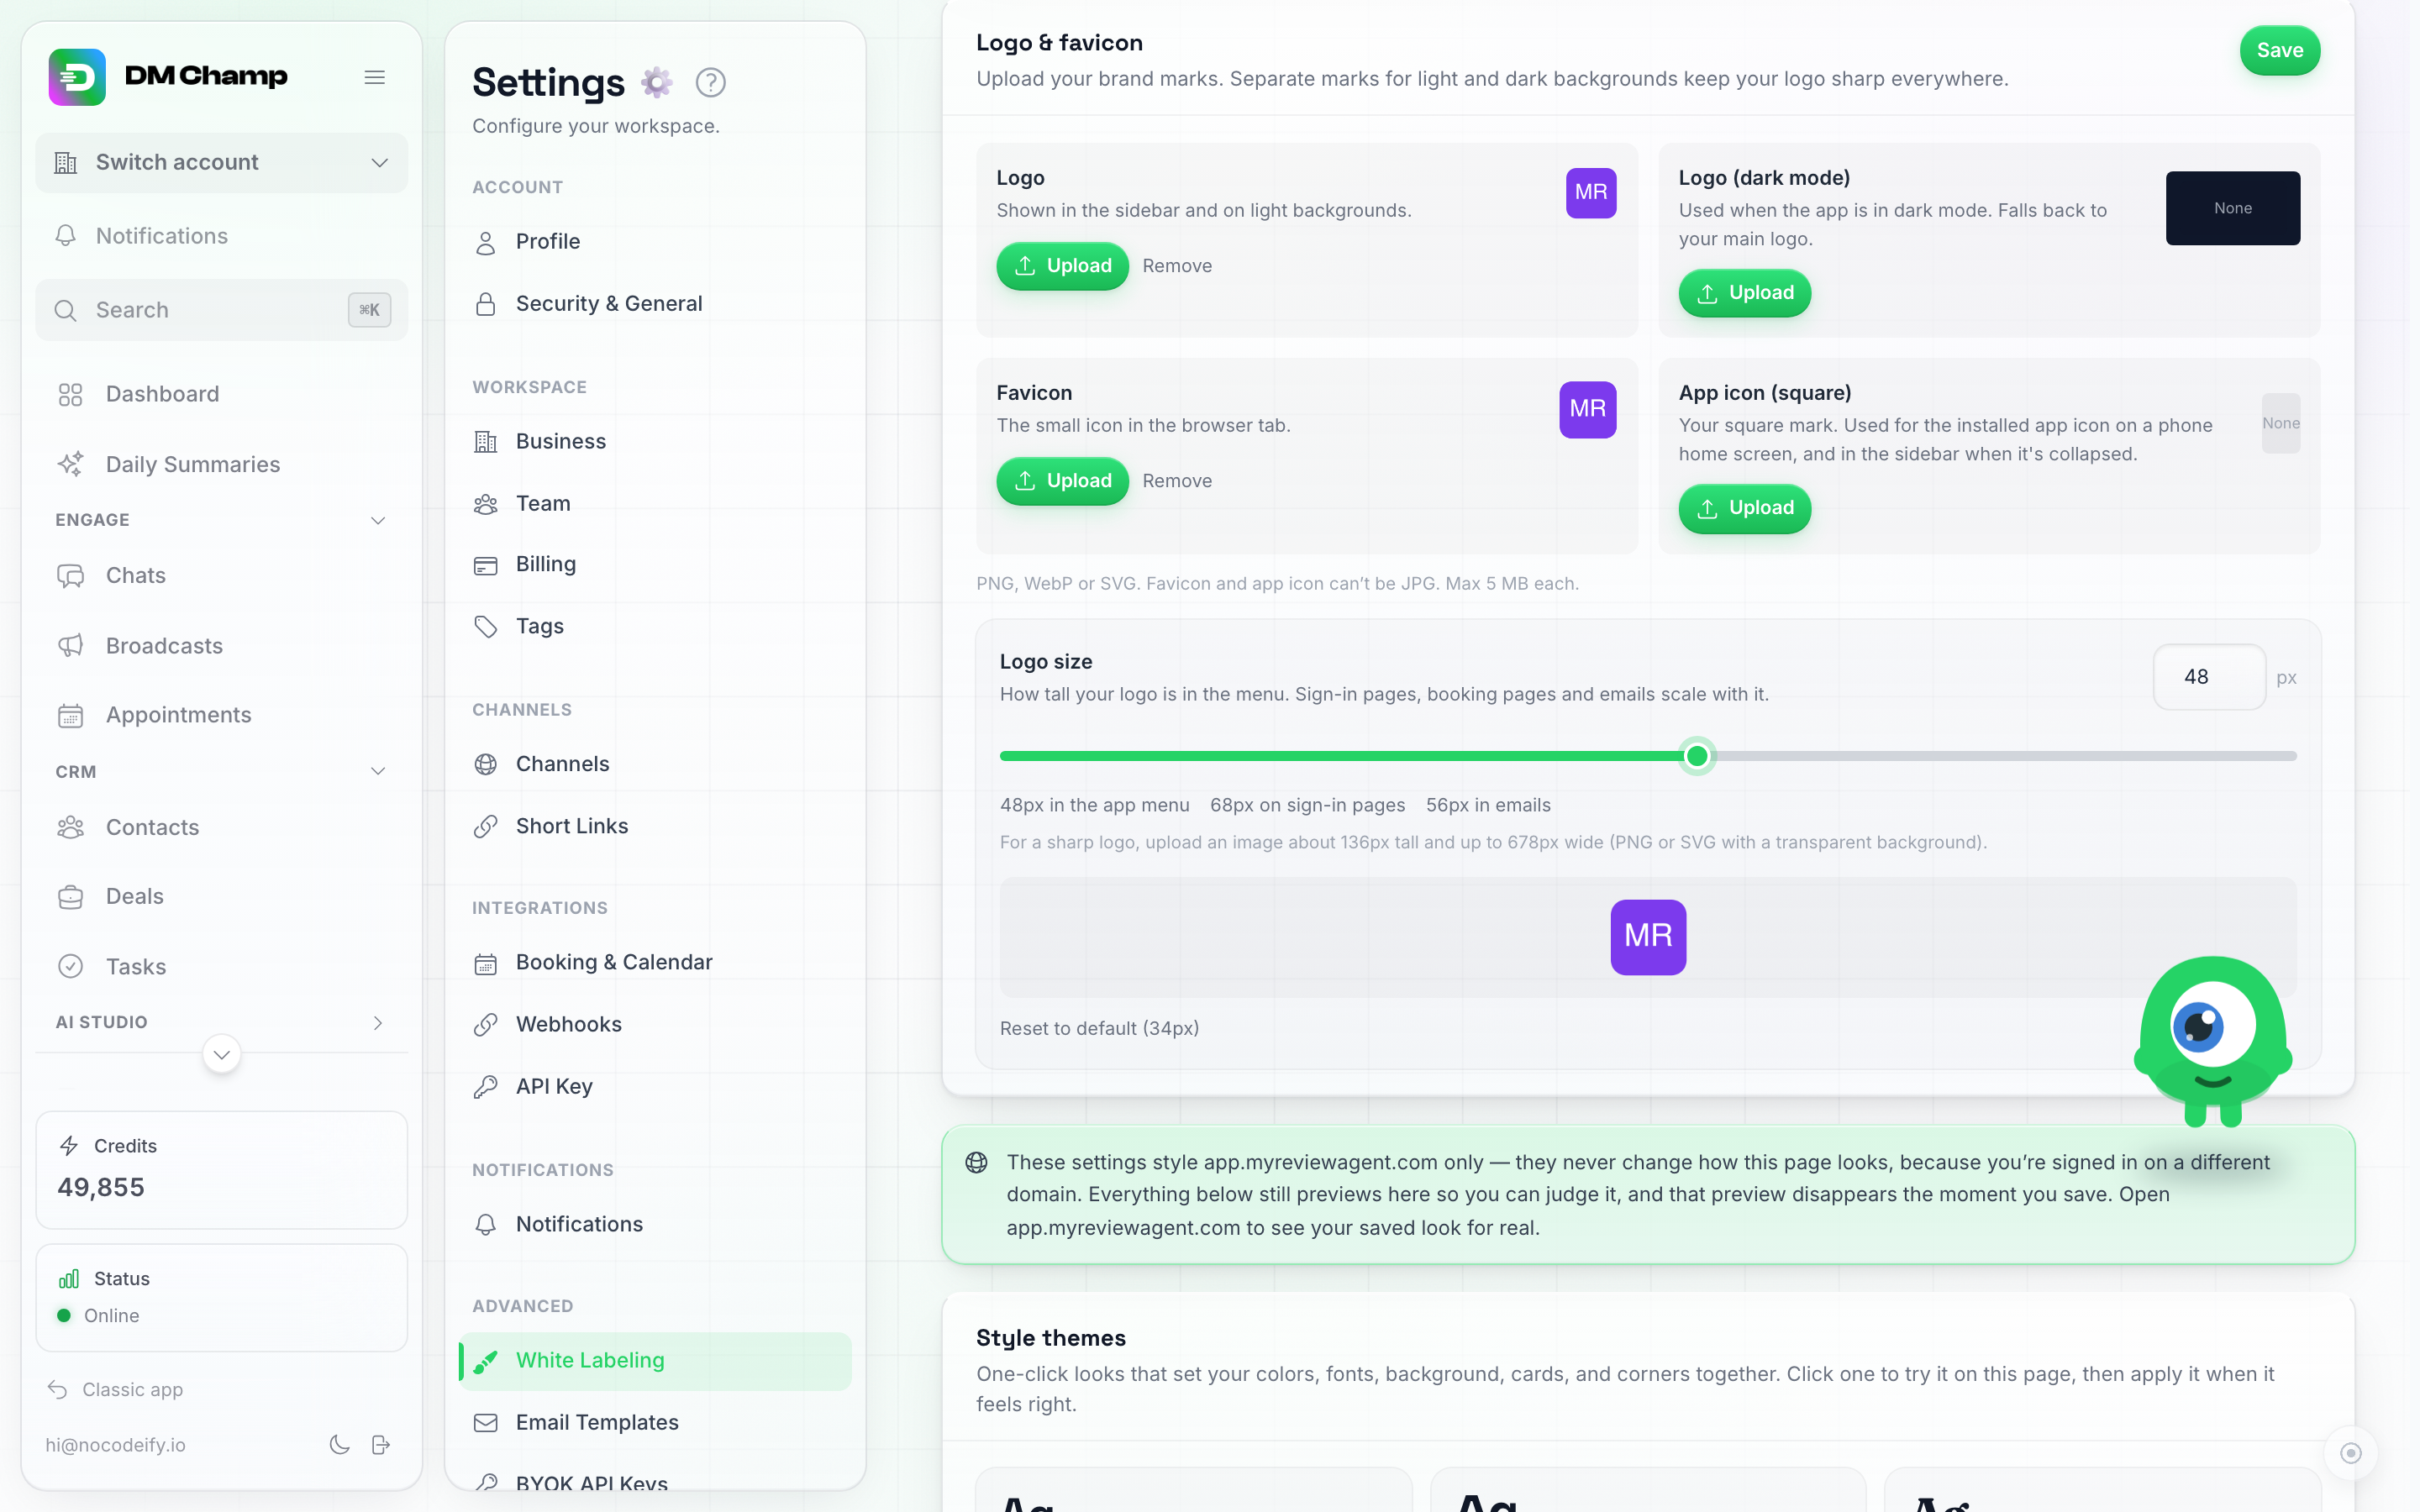
The Logo & Favicon card — four slots (Logo, dark-mode logo, Favicon, App icon). Each Upload button saves the instant you pick a file. Logo size underneath sets how big your logo renders; that one needs Save.
6c. Colours
In the Colours card, click the Primary Color square and set your brand’s main colour (defaults to WhatsApp green, #25D366), then do the same for Accent Color. Click Save.
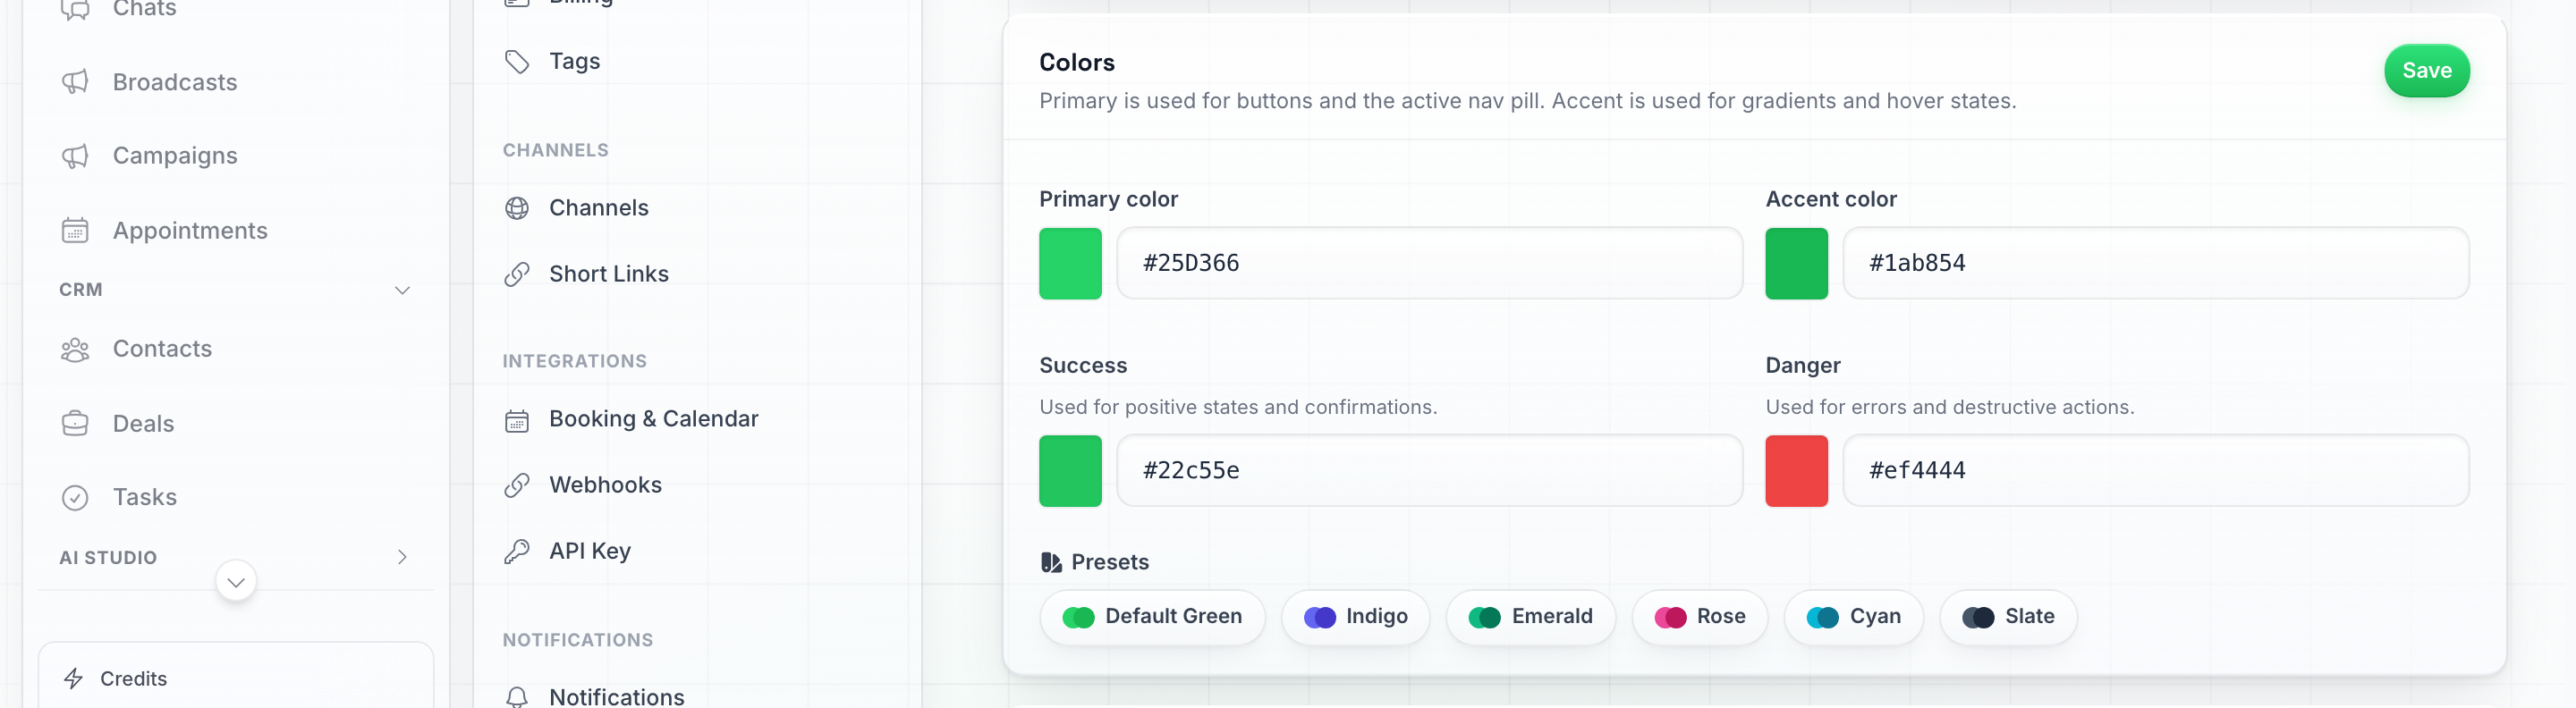
The Colours card — Primary and Accent are the two you'll touch today; Success, Danger, and the preset palettes are optional shortcuts.
6d. Fine-tune later (optional)
Fonts, density, and a custom login background all live further down the same panel — they’re not required for a working white-label, so feel free to skip them today and come back later. Full reference: White-Labeling and Custom Domains.
After saving, hard-refresh your custom domain (Ctrl+Shift+R on Windows, Cmd+Shift+R on Mac) and confirm the browser tab now shows your name and icon, and the buttons use your primary colour.
Step 7 — Create a test sub-account and log in as them (≈ 10 min)
You’re not done until a real client experience works end to end. Create a sub-account for yourself (use a personal email you can check) and confirm the flow feels right.
- In the main sidebar, click Sub Accounts (its own page, right above Settings).
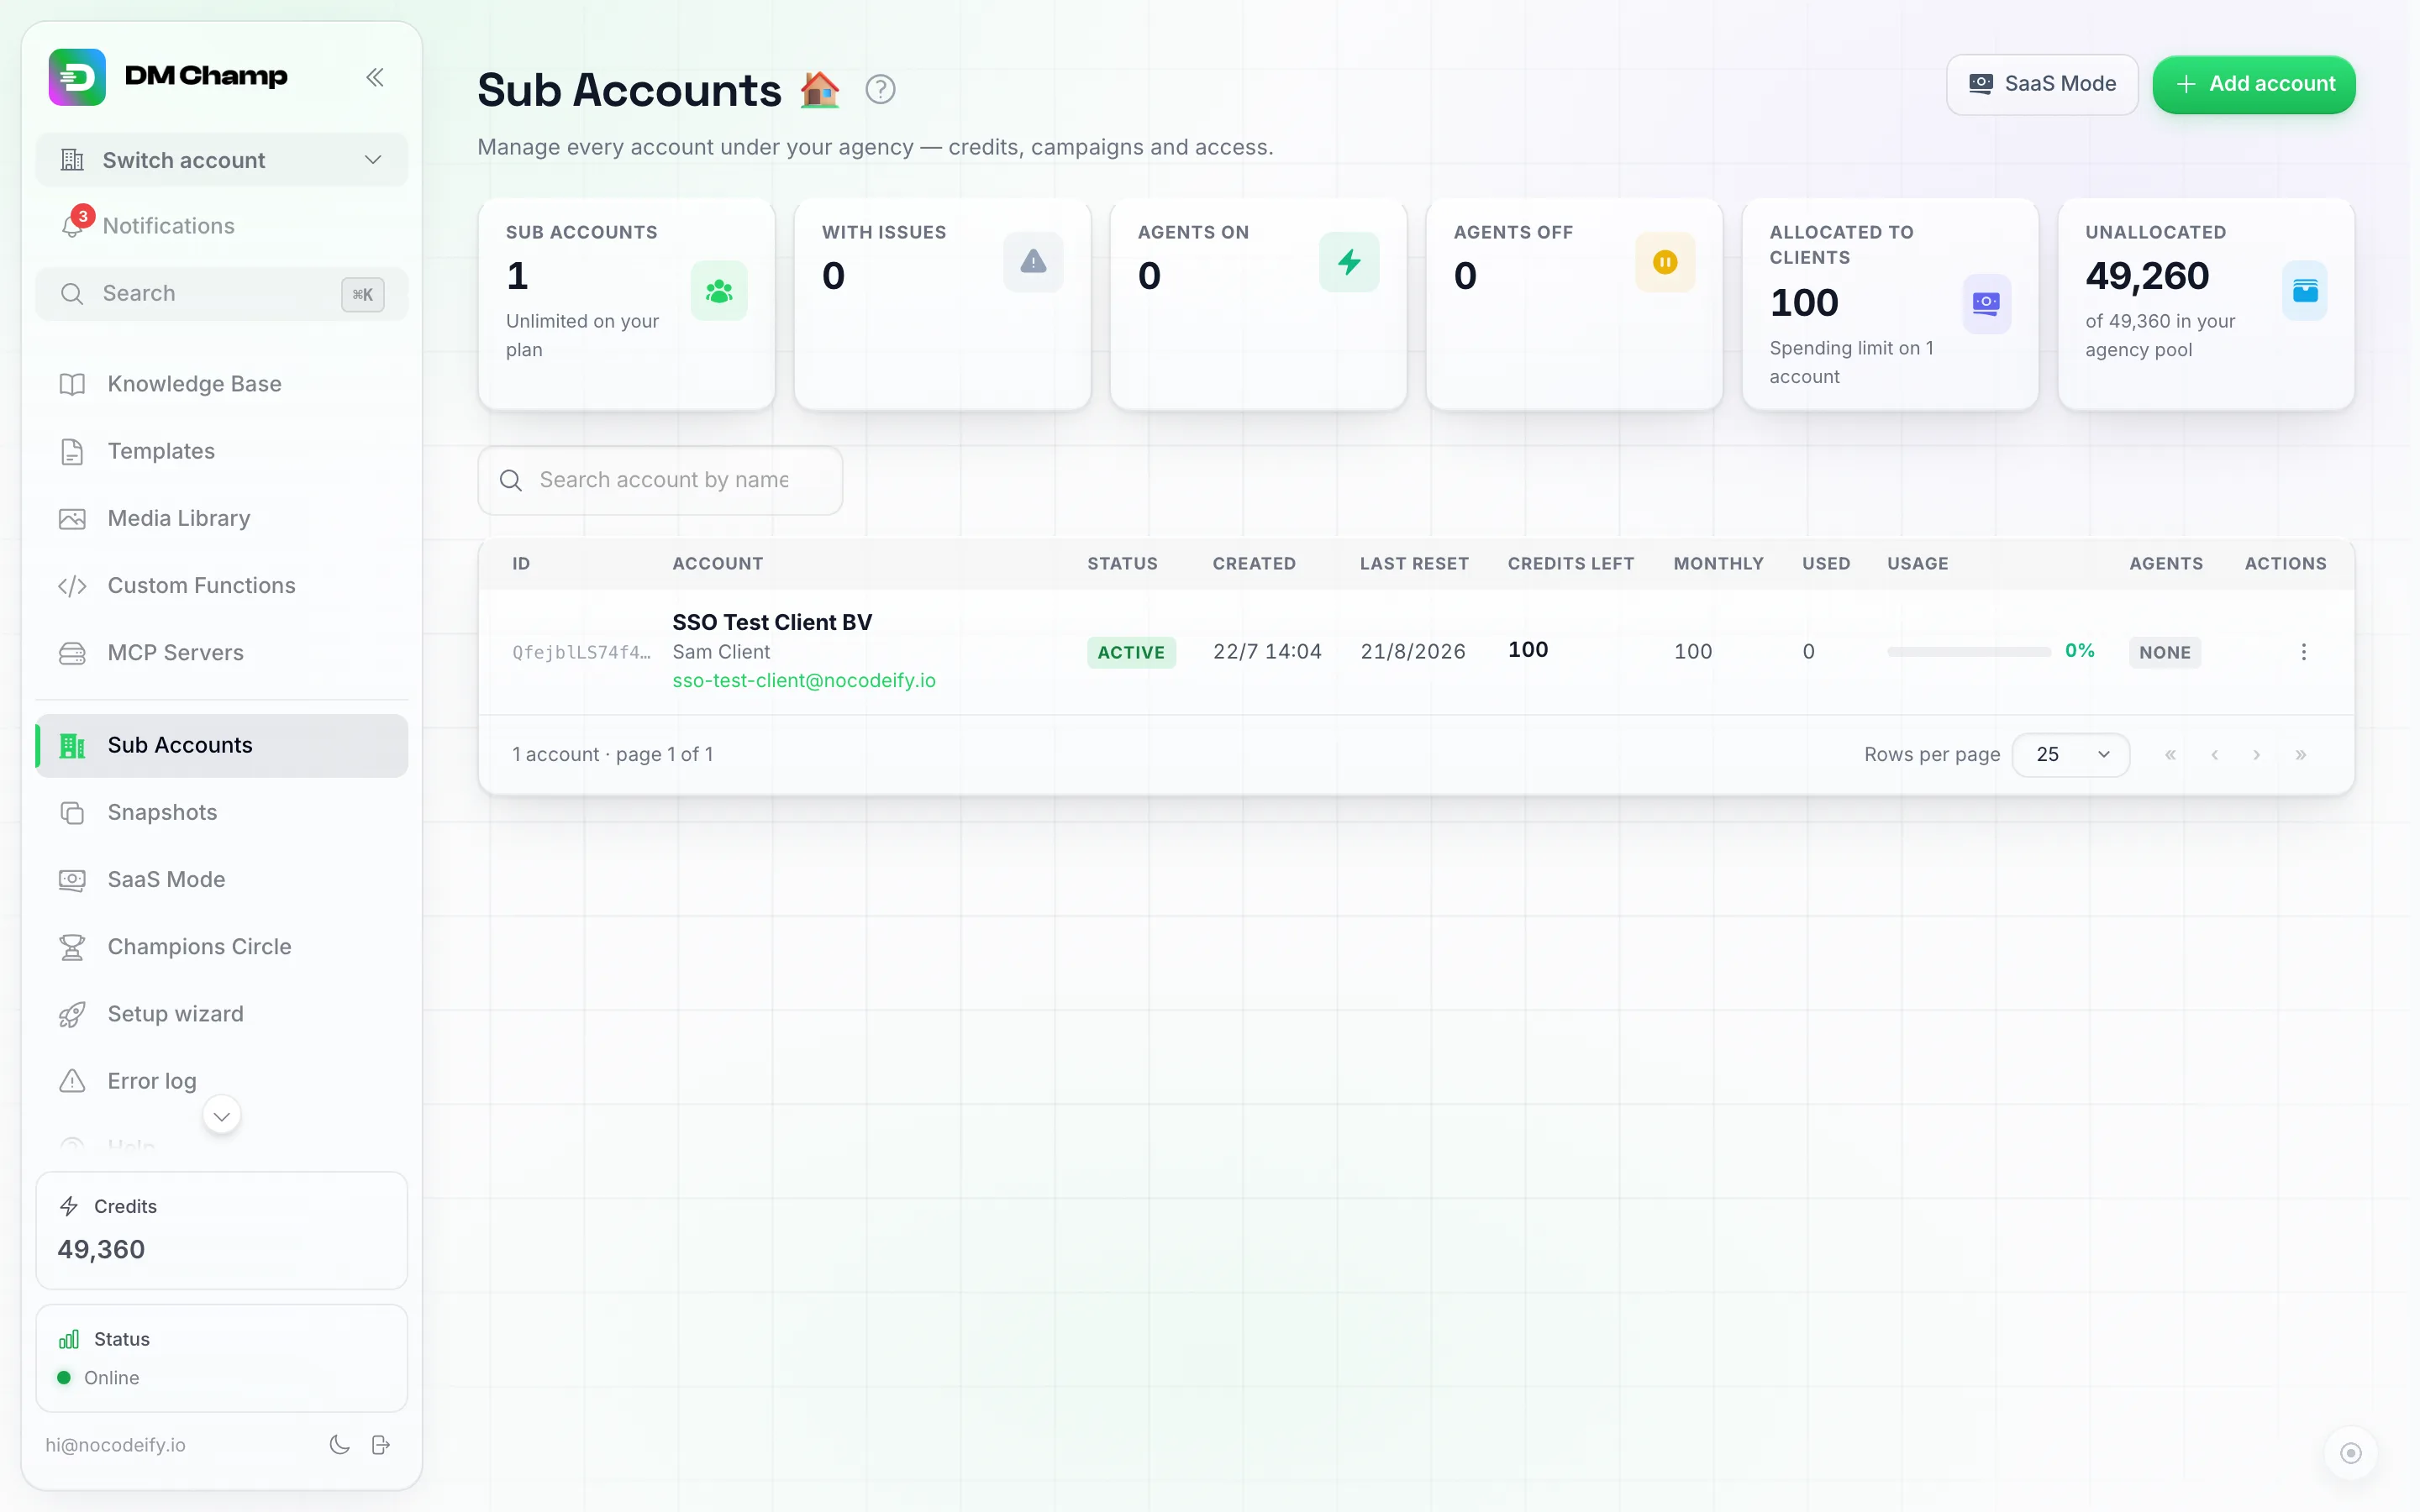
The Sub Accounts page — this is where you'll create the test account and, later, every real client.
- Click the green Add account button, top right.
- Fill in your test details across the 3-step modal:
- Account — your first name, last name, and a personal email you can check.
- Business — a business name (required); the rest can stay blank for the test.
- Features — leave the defaults.
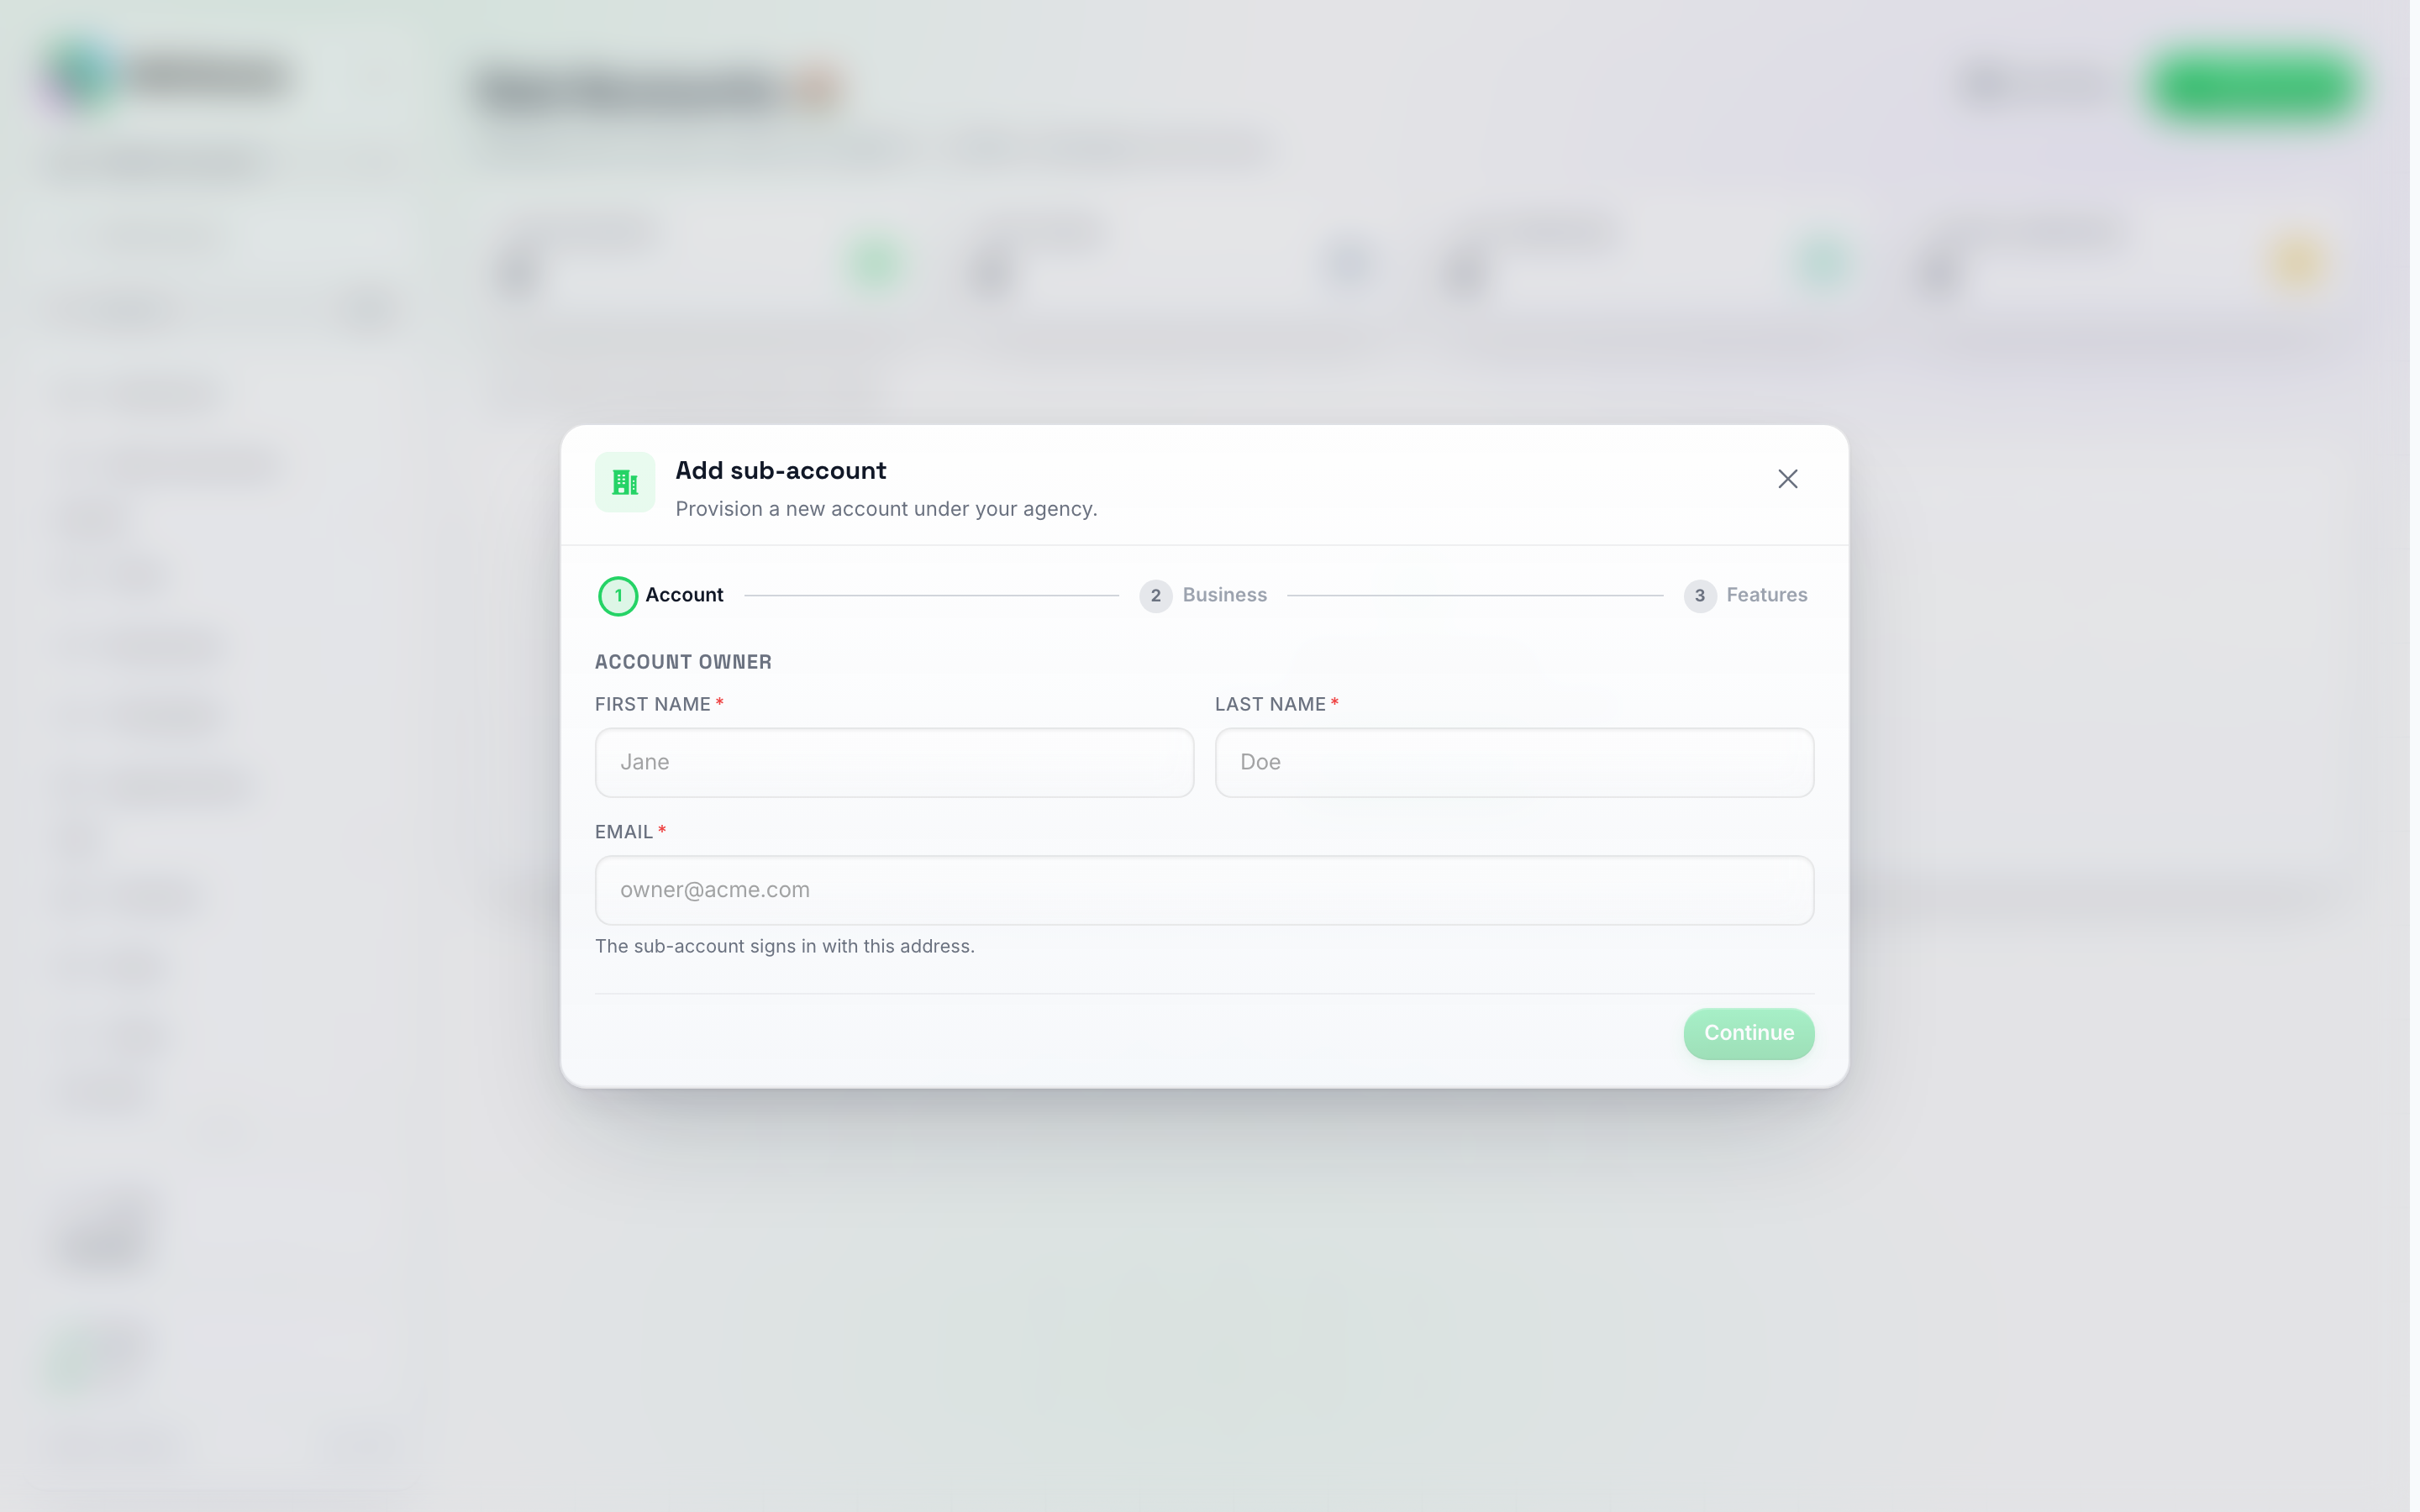
The Add account modal, step 1 of 3. The email you enter here becomes the test client's login.
- Click Create Account.
- A confirmation screen shows the generated password. Copy it now — you won’t be able to see it again. The client also receives this in an email.
- Open the email — check that it shows your App Name (Step 6a) as the sender brand, not ours. If it still shows our name, your branding hasn’t propagated yet — wait 1 minute and check again.
- Log out of your agency account (top-right user menu → Sign Out).
- Open your custom domain in an incognito / private browsing window and sign in with the test sub-account’s email and copied password.
- Walk through the first 30 seconds of the sub-account experience:
- Does the login page show your brand name and logo?
- Does the dashboard chrome use your primary colour?
- Are the page titles (browser tab) using your App Name?
- If you turned off “Show help menu”, confirm there’s no Help entry in the sidebar.
- Do the Terms / Privacy links (if you’ve added them) go to your URLs?
If anything is still showing the wrong name or colour, go back to Step 6 and fix it. Full guide for the sub-account flow: Sub-Account Management.
What now?
You have a branded, live, working white-label. The rest is scale and refinement:
- Set your reselling pricing. If you picked reselling in Step 1, configure your credit markup and plan pricing in Agency Accounts before sending the payment link to real customers. Each plan can bill monthly, yearly or every N weeks and can start with a free trial — both are set on the plan itself in Step 3 — Set up pricing tiers.
- Set up auto-recharge for clients. Sub-Account Auto-Recharge keeps clients from running out of credits at 2am.
- Customise the email sender. By default, transactional emails go out under your brand name from a neutral managed address that never names the platform. Wire up your own sending domain on the Custom Email Provider page so client emails come from
[email protected]instead. There’s a Mailgun option and an SMTP option (Postmark, SES, EmailIt, self-hosted). - Onboard your first real client. Sub-Account Management covers the day-to-day of running clients — credit allocation, signing in as the client, blocking and unblocking, etc.
If anything in this guide didn’t work as expected, the White-Labeling and Custom Domains page has the full troubleshooting section.
Selling It: What We Provide, and What Is Yours
Resellers ask us for sales material, case studies, pricing guidance and legal templates. Here is the honest split.
What exists today:
- Case studies and playbooks you can use in your own pitch, published at dmchamp.com/resources — including the agency $10k MRR playbook. They are public pages, so you can send a prospect the link or lift the numbers into your own deck.
- A demo you can run in front of a prospect without touching your own account: the chat widget’s Client demo link puts your widget on top of their website. See Show the Widget on Someone Else’s Website.
- Snapshots — a finished client setup you can stamp onto every new sub-account, so your second client takes minutes instead of hours. This is the closest thing to a productised offer the platform gives you.
- The pricing tools themselves — your own plans, your own prices, your own checkout, in SaaS Mode.
What we do not supply:
- Ready-made sales decks or brochures. The Champions Circle membership does include ready-made agency website templates, agent snapshots and the monthly teardowns, and that is the full extent of the sales kit we provide.
- Legal templates: no MSA, SLA or client contract boilerplate. You are the contracting party with your clients, so those have to be yours and reviewed by your own lawyer.
- Recommended retail pricing for your market. What a client is worth in Milan is not what they are worth in Manila, and a number from us would be a guess about your market.
One rule that does apply to your pricing: your Terms of Service commit you not to undercut the platform’s official direct pricing. Pricing above it, bundling it with your services, or building it into a retainer is all fine and is what most agencies do.
If you would rather refer customers than run your own platform, there is also the affiliate program: 40% recurring commission on every subscription payment.
Welcome to running your own platform.